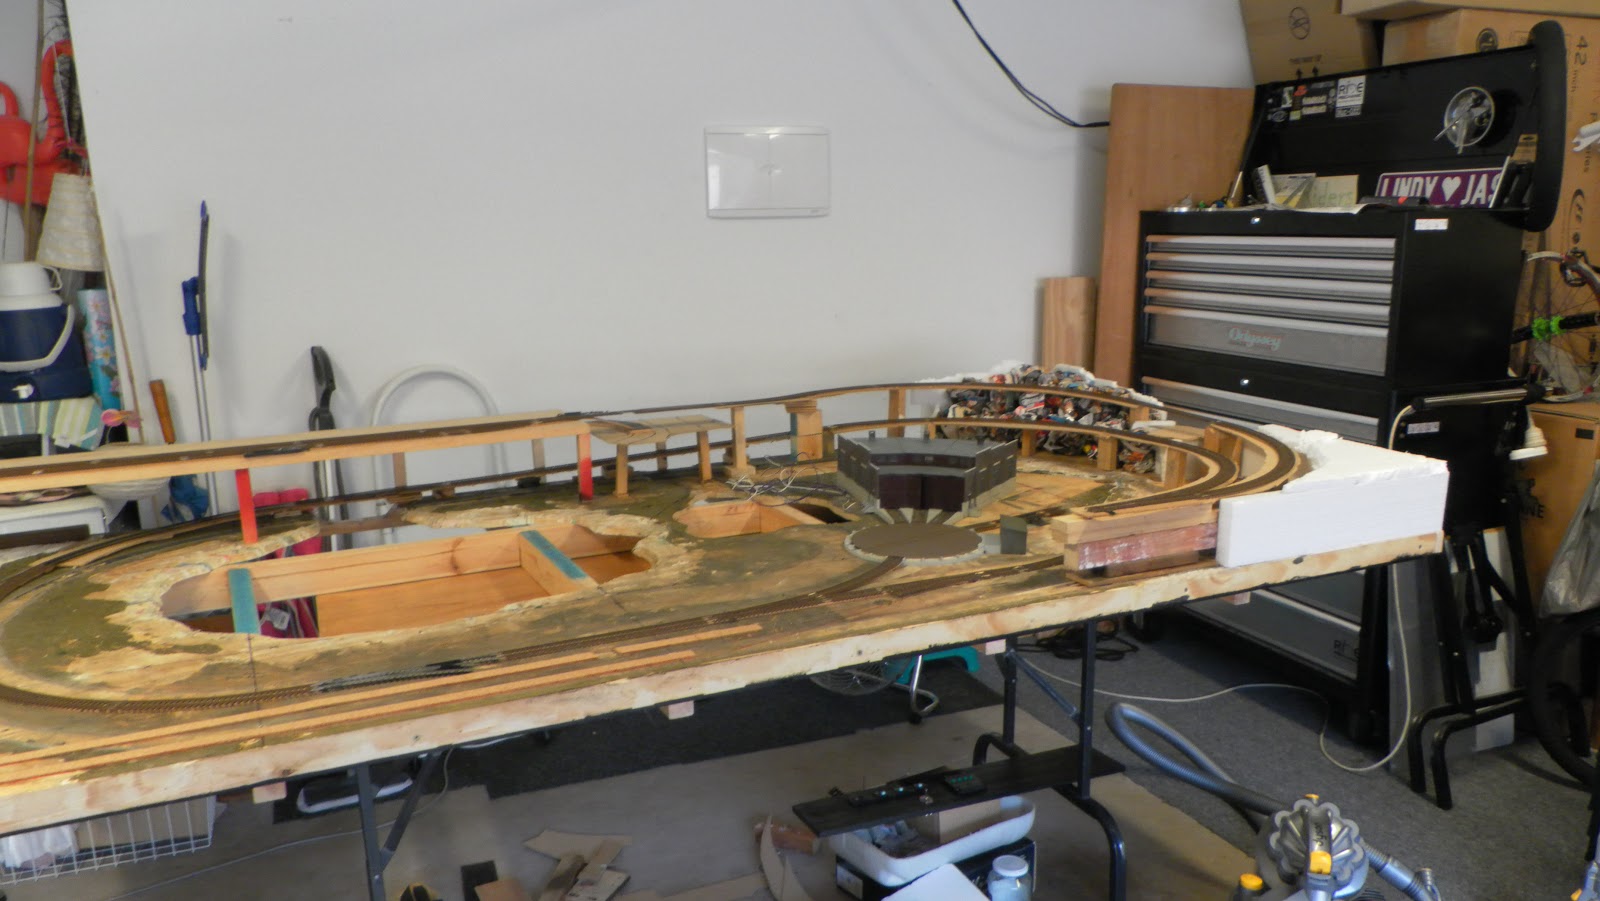
My second HO layout. Built on the original table of the old layout (see first 2 pictures), this was many times better than the last one.
Another tedious transfer over from Farcebook.
90% of the materials, track, scenery, buildings, electrics etc. have
been reused on the new railway. There was very little that couldn't be
salvaged. I apologise for the poor quality of some early photos.
Construction on the new railway began in mid January 2014..
Construction on the new railway began in mid January 2014..
July 2012, The old railway.
Sure, it looks kinda nice for a first effort, but that's just the scenery. The track layout is the most important thing in a model railway, and if it's crap, then everything that follows is spoilt.
Sure, it looks kinda nice for a first effort, but that's just the scenery. The track layout is the most important thing in a model railway, and if it's crap, then everything that follows is spoilt.

10/09/2013
In hindsight it'd been better if I'd have left it for later on, but the roundhouse was the first thing to be refurbished for the new layout. After careful cleaning, unpainted grey "concrete" base was sprayed with a Tamyia concretey-looking colour, and a basecoat of Tamiya Hull Red applied to the brickwork..

Followed by Tamiya Nato Brown on individual bricks. My first experiments in proper weathering were undertaken on the roundhouse a few months later. Washes were used to highlight the mortar lines and add streaks and variation to the concrete. I must've gotten lucky with it, because even at the time of writing, (2018) this still meets the overly-picky standards I try to stick with.

14/01/2014.
Here's the table stripped back as far as need be, with almost everything that was removed, been stored and awaiting refurbishment.
Here's the table stripped back as far as need be, with almost everything that was removed, been stored and awaiting refurbishment.

After many hours of experimenting and searching for a new layout desing, I chose to adapt John Allen's Gorre & Daphetid, a
famous layout originally concieved in the 1940s. With modifcations to
suit my needs, it should look real good and provide much more potential
for operations..

As most of my track is Atlas code 100, I used Atlas' free track planning program downloaded from their website, to make my own version of the G&D. Nearly all the track pieces recovered from the original layout, had to go through the tedious job of scrubbing, picking and scraping off any remaining ballast that was stuck to them. They were then sprayed with some weathered wood colour as a basecoat, followed by brushing Tamiya Nato Brown on the rails, chairs and anything else that would be steel on the real thing. 2 coats were required, and that was real tedious.

21/01/14
A subframe of 35x70mm pine was made, with the cross-members notched for a snug fit on the lengthways timbers.

All screwed together.

To save some weight (this thing hangs above the car in the garage) I opted not to refit the folding legs but instead sit the
board on a trestle table when the layout is in use.

30/01/14
I've never done inclined track before, so after lots of research I decided to support the track with 3mm MDF and offcuts. The latter are carefully combined and shimmed to get the right gradients and keep the transitions smooth. I figured the easiest way to build this layout is to start at the top station, and work downward. This time, I decided to try cork roadbed instead of the soft foam of last time. Cork's much better, in my book, I'll never use anything other than cork again.

Testing and tweaking as I go.

The three point motors at the top station installed and tweaked. The track looks a lot better painted properly this time.

31/01/14
This is the next section to be laid. The crossing is only there temporarily until I can buy a bridge to put in it's place.

09/02/14
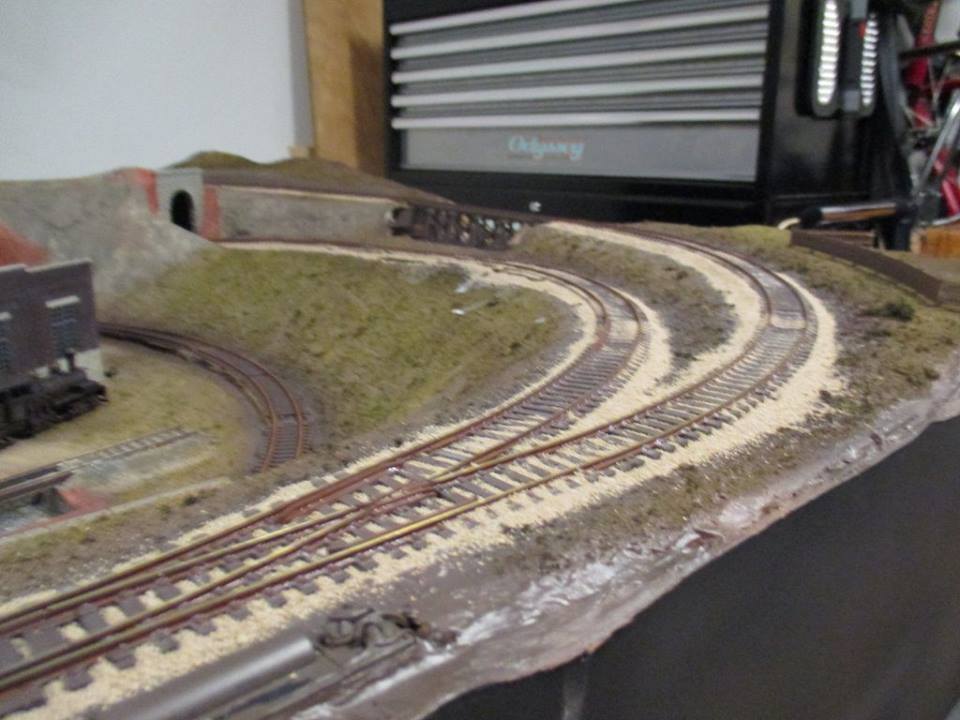
4 full days spread over 2 weekends has brought it to this. The mainline now runs down to the yard at table level.
The signal box and roundhouse are there temporarily to make terrain planning easier.
The signal box and roundhouse are there temporarily to make terrain planning easier.

The turntable and ash pit are permanently installed but not wired yet. Oh yeah, I built a little ashpit, my first scratchbuild.

The ashpit uses plastic I-beams, miniature
bricks, some metal scraps and a chunk of wood. It's been
painted/weathered but the bricks along the front need another row and I
need to add some real cinders to the pit.
I'm very pleased with the cracks, they are just carved into the wooden base with a Stanley knife and given a black paint wash with the excess wiped off.
I'm very pleased with the cracks, they are just carved into the wooden base with a Stanley knife and given a black paint wash with the excess wiped off.

Already running low on track and rail joiners, so the roadbed has been stuck down in-situ so I remember where everything goes.

This lift-off shed covers the turntable motor. The refurb and weathering were pretty simple, just a clean in warm water, and once it dried, it got some brown drybrushing, and a thin black wash to finish.

16/02/14
The scenery base has started at one end of the layout.

This area is flat because I will be building a timber trestle here, and it will be easier to start with a flat base.

The foam has been cut and glued into place, followed by scrumpled-up junk mail for the scenery base, and held down with some tape. Paper-mache will follow at some point.

This part was tricky to work out on paper, but it works.
There will be a shallow creek in the centre, and a narrow road on the right.
The remains of the mainline from the old layout can be seen at the lower left..

There is just enough clearance for the track below, and for the road above.


Not sure what I'm doing with this one's throw-mech, I'm certainly not leaving it as is!

20/02/14.
The truss bridge has now been permanently installed. The trusses themselves are still removeable. My photography isn't great, but something I did do right (on the first layout) is the peeling paint effect on the trusses. I'll do a write-up on the method someday but for now, there's plenty of useful references elsewhere - Google "salt chip weathering".

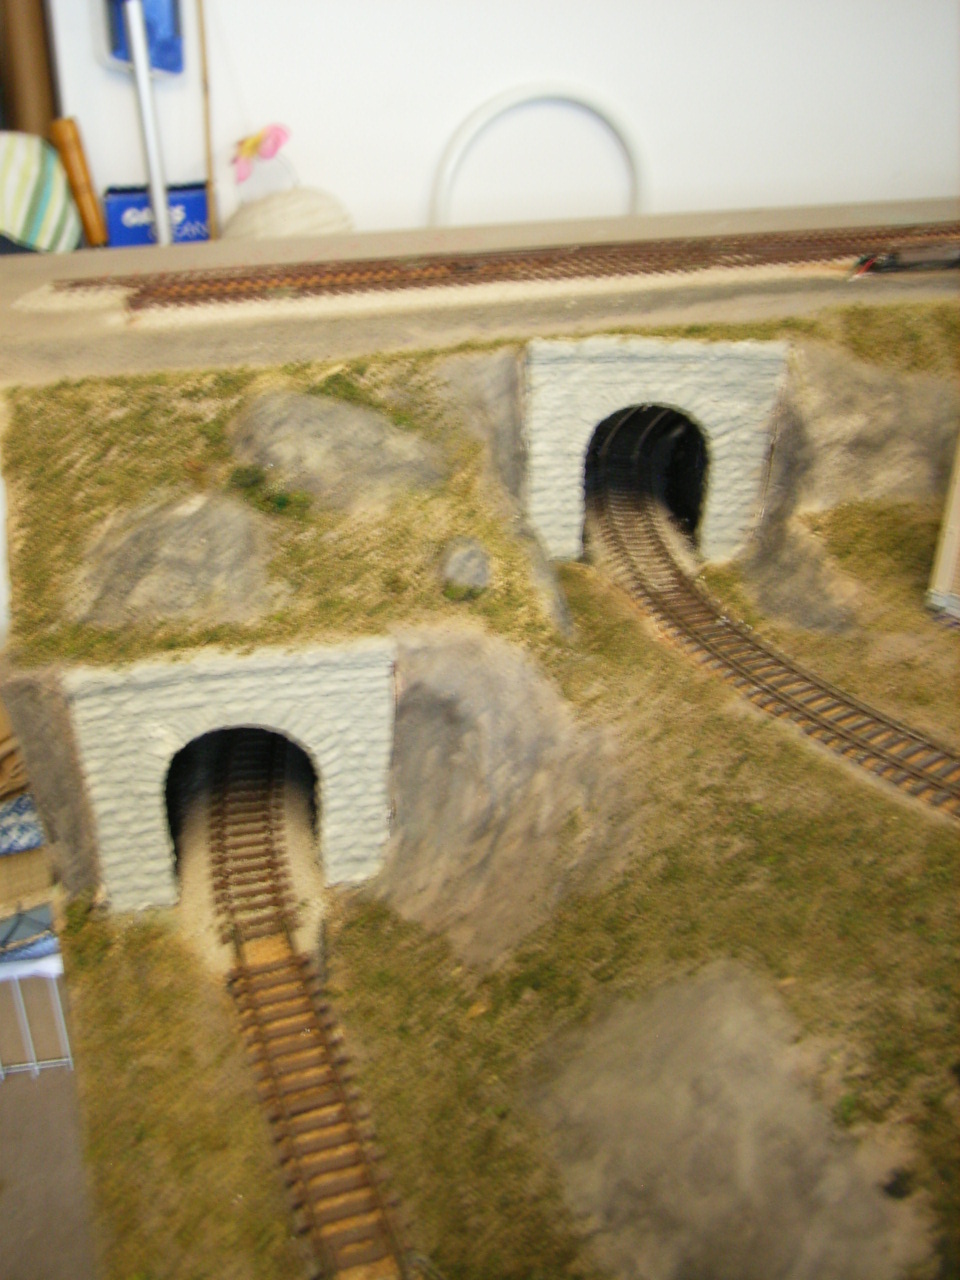
One of the salvaged tunnel portals has been repainted and superglued into place. These are very nice resin castings by Chooch.

The trestle is made from balsa and matchsticks. Not sure I'm real happy with it though. The brown marks on it are an experiment in weathering; If it doesn't work out I can paint over it. Brick abutments will follow soon.

This lift-off shed covers the turntable motor. The refurb and weathering were pretty simple, just a clean in warm water, and once it dried, it got some brown drybrushing, and a thin black wash to finish.

16/02/14
The scenery base has started at one end of the layout.
This area is flat because I will be building a timber trestle here, and it will be easier to start with a flat base.

The foam has been cut and glued into place, followed by scrumpled-up junk mail for the scenery base, and held down with some tape. Paper-mache will follow at some point.

This part was tricky to work out on paper, but it works.
There will be a shallow creek in the centre, and a narrow road on the right.
The remains of the mainline from the old layout can be seen at the lower left..

There is just enough clearance for the track below, and for the road above.

19/02/14.
Two new points arrived in the mail so I spent the entire next day
painting, modifying and installing them. This one has had it's throwing
mechanism shortened to make it easier to hide.

Not sure what I'm doing with this one's throw-mech, I'm certainly not leaving it as is!

20/02/14.
The truss bridge has now been permanently installed. The trusses themselves are still removeable. My photography isn't great, but something I did do right (on the first layout) is the peeling paint effect on the trusses. I'll do a write-up on the method someday but for now, there's plenty of useful references elsewhere - Google "salt chip weathering".

One of the salvaged tunnel portals has been repainted and superglued into place. These are very nice resin castings by Chooch.

The trestle is made from balsa and matchsticks. Not sure I'm real happy with it though. The brown marks on it are an experiment in weathering; If it doesn't work out I can paint over it. Brick abutments will follow soon.

28/2/14
Another day and the mainline is finished - save for a large 18 inch long bridge (to be installed at the extreme right). Hopefully I can buy that soon.
Another day and the mainline is finished - save for a large 18 inch long bridge (to be installed at the extreme right). Hopefully I can buy that soon.

Scenery
work now resumes, with anything that needs to be solid built out of
styrofoam and/or wood, and hillsides formed with crumpled up newspaper.


Both mainline tunnel tracks are nearly finished, just some ballasting to be done at the tunnel mouths.


5/03/14.
The near end now has the lightweight newspaper sub-terrain added.
The near end now has the lightweight newspaper sub-terrain added.

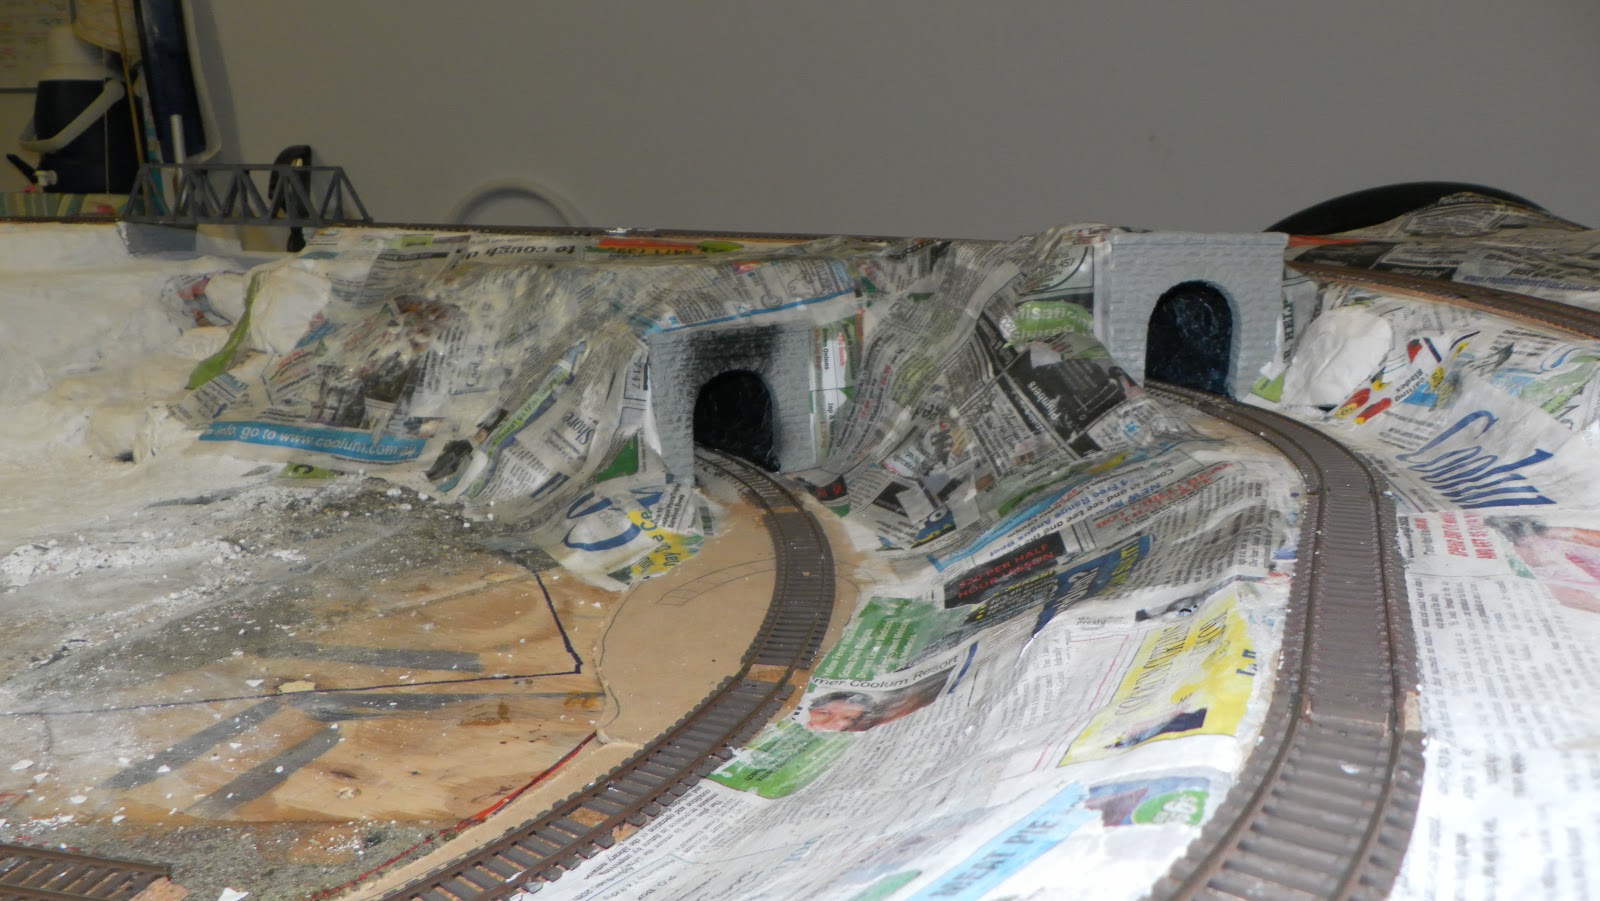
And the tunnels have been started. They have been painted black inside, and the track ballasted while access is relatively easy.

The other ends of the tunnels have received similar treatment.

The roadbase is almost done, just need to do some paper mache-ing to fill in the little gaps and smooth the gradients.

The roadbase to the top and the lake bed are installed.

Some stone retaining walls are being cast in plaster. After they harden a bit, I took them out and carved the still damp plaster into a cut stone block effect.

For a first attempt, I won't complain. Just needs painting, weathering and and installation.

20/03/14
The paper mache terrain has been started. There's only 2 of 4 layers so far but I'm very happy with it.

The road to the bottom is being smoothed out.

The small truss bridge has finally been permanently installed, with abutments made from the 2-track tunnel portal of the last layout.


A liner has been installed in the upper tunnel near the waterfall. The liner is just aluminium foil, crumpled up and carefully opened out again, then painted and installed.
Looks okay, but the fragility is a pain in the arse.

The liners need only go in by about 7-10".

Work has started on the lake, with the first two layers down. a small culvert on the near side of the lake will carry away the water running from the waterfall.

29/03/14
The wiring diagram is complete. It's a bit of a rat's nest, but as long as I work in stages and highlight sections I've already done, it should be manageable.

31/03/14
Used some of the miniature bricks that were leftover from the ashpit to make a pair of abutments. Not terribly happy with these, either though..

3/04/14.
Most of the paper mache is finished, and the first plastering has begun.

The plaster road surface is finished and sanded smooth. Some plaster rock castings have been added here and there too.

The finished road is just visible, not sure weather I'll just paint it, or add dirt or something to it as well... That's a long way off though.
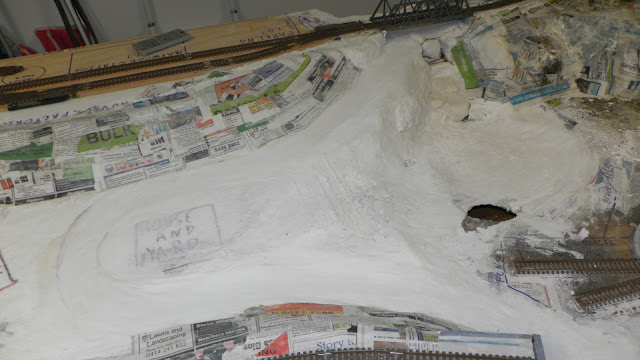

I finally got round to installing the lower tunnel portal at this end, so I built up the foam and paper mache around it. Most of the paper mache needs at least 3 more layers before plastering.


The layout after a better colour was applied. The rocks and road still need to be painted.
I still need to get two more tunnel portals and fill the terrain in around them.

The creek, waterfall and lake have been painted - very difficult to get it right but I'm very happy with it. It will later receive some fake 'water' goo that sets hard, when the budget allows.


The molds were made from air-dry modelling clay. The only drawback is that the mold gets destroyed when the finished casting is removed. That's okay though, these two portals cost me $8.50, and I already had the plaster on hand.

The first casting. it broke in many places but some superglue and weathering will fix that.
The second one turned out better, it went closer to the edge of the table. They both have some bent coat-hanger wire embedded in the plaster for strength.

I finally bit the bullet and made the remaining retaining wall sections (the white one closest, and the other end of the missing bridge).

The retaining walls/bridge abutments have been fitted, and the first plaster tunnel portal is trial fitted.

The walls are propped up while the glue dries.


27/05/14
The second tunnel portal has been cast and installed. The terrain around the new portals and retaining walls is complete with rocks and painted.

The new portals have turned out great.

The walls have their basecoat but still need weathering and plants.

Gonna need that bridge real soon.

Very pleased with how the rocks have turned out, this was my first attempt at modeling rocks.
I collected some small, rough and irregularly-shaped rocks, partially wrapped them in aluminium foil, and the rock is removed. This makes the mold. Plaster is poured and left to dry.
When removed from the mold, the casting is glued into place and the edges are blended into the terrain with more plaster.
Once all was completely dry, dull brown and yellow acrylic paint washes were randomly dabbed on.
A thinned black was was added over that to make it all the right colour and bring out the details.
It wasn't easy, as this was mostly trial and error but they look great to my eye, they just need some greenery and perhaps a tiny bit of white, drybrushed over the rough bits to highlight them.

The road still needs to be painted but that aside, most of the scenery painting is done.

10/06/14
The wiring is complete, so I can finally run trains and test the track.
I'm adding a temporary bridge made of wood so I can run around instead of back and forth.


The small truss bridge has finally been permanently installed, with abutments made from the 2-track tunnel portal of the last layout.


A liner has been installed in the upper tunnel near the waterfall. The liner is just aluminium foil, crumpled up and carefully opened out again, then painted and installed.
Looks okay, but the fragility is a pain in the arse.

The liners need only go in by about 7-10".

Work has started on the lake, with the first two layers down. a small culvert on the near side of the lake will carry away the water running from the waterfall.

29/03/14
The wiring diagram is complete. It's a bit of a rat's nest, but as long as I work in stages and highlight sections I've already done, it should be manageable.

31/03/14
Used some of the miniature bricks that were leftover from the ashpit to make a pair of abutments. Not terribly happy with these, either though..

3/04/14.
Most of the paper mache is finished, and the first plastering has begun.

The plaster road surface is finished and sanded smooth. Some plaster rock castings have been added here and there too.

The finished road is just visible, not sure weather I'll just paint it, or add dirt or something to it as well... That's a long way off though.


I finally got round to installing the lower tunnel portal at this end, so I built up the foam and paper mache around it. Most of the paper mache needs at least 3 more layers before plastering.
12/05/14
The basecoat on the scenery is applied, clearly it turned out too dark. No matter, it's just watered-down acrylic.

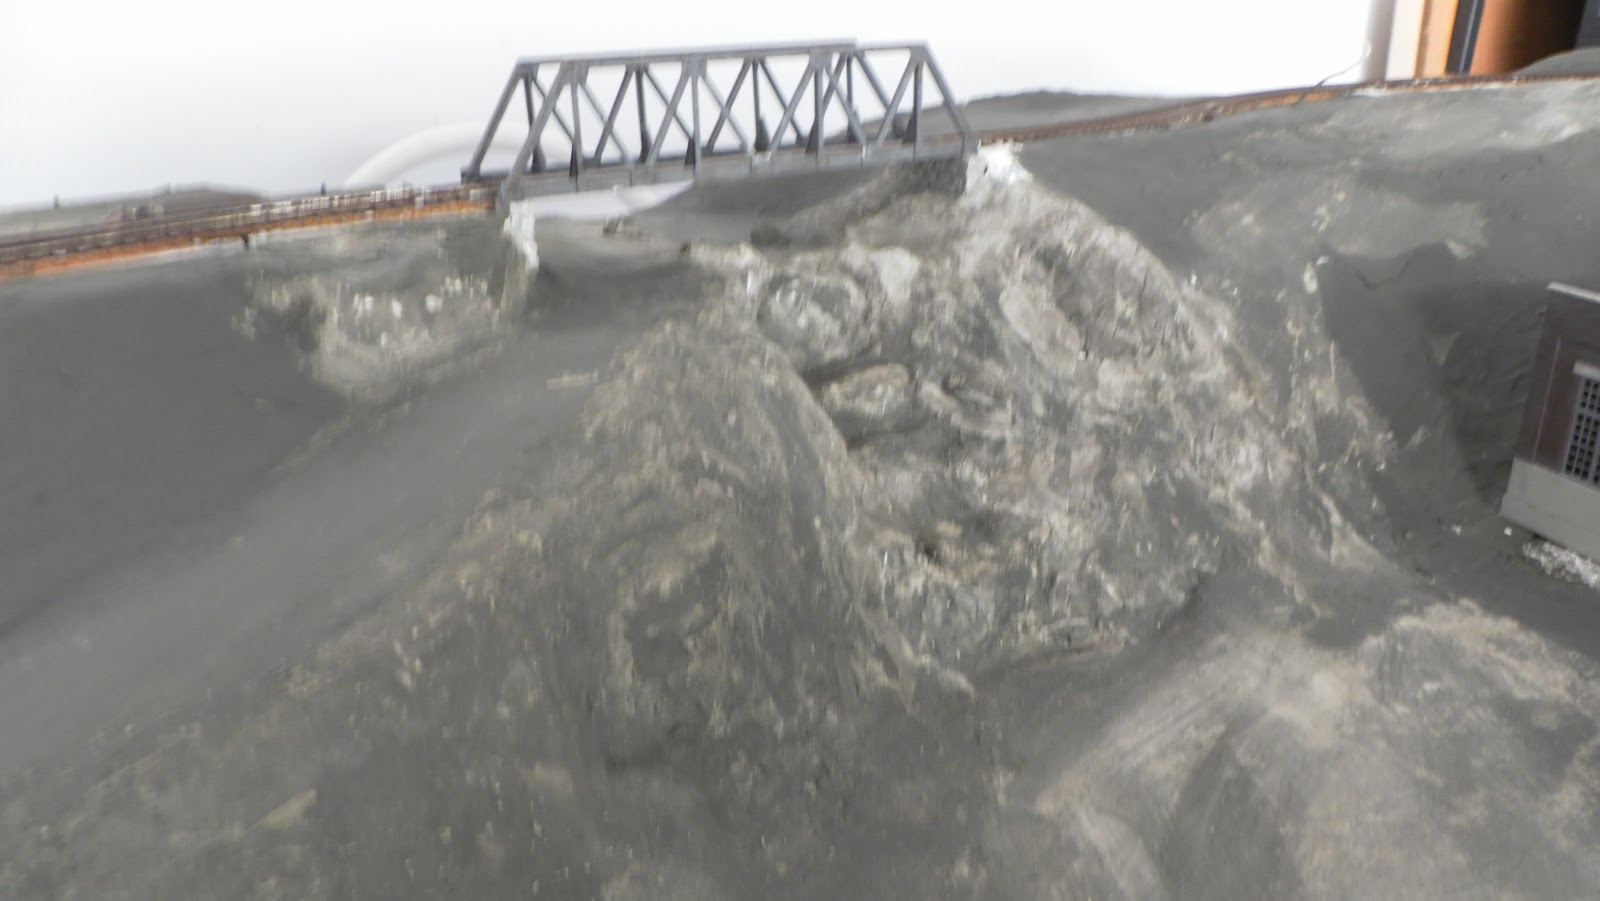
The layout after a better colour was applied. The rocks and road still need to be painted.
I still need to get two more tunnel portals and fill the terrain in around them.

The creek, waterfall and lake have been painted - very difficult to get it right but I'm very happy with it. It will later receive some fake 'water' goo that sets hard, when the budget allows.


24/05/14
I needed two more tunnel portals, but it would be a long time till I had the money for another pair of resin ones. So I decided to try casting plaster ones, using the originals as a pattern.
I needed two more tunnel portals, but it would be a long time till I had the money for another pair of resin ones. So I decided to try casting plaster ones, using the originals as a pattern.
The molds were made from air-dry modelling clay. The only drawback is that the mold gets destroyed when the finished casting is removed. That's okay though, these two portals cost me $8.50, and I already had the plaster on hand.

The first casting. it broke in many places but some superglue and weathering will fix that.
The second one turned out better, it went closer to the edge of the table. They both have some bent coat-hanger wire embedded in the plaster for strength.

I finally bit the bullet and made the remaining retaining wall sections (the white one closest, and the other end of the missing bridge).

The retaining walls/bridge abutments have been fitted, and the first plaster tunnel portal is trial fitted.

The walls are propped up while the glue dries.


27/05/14
The second tunnel portal has been cast and installed. The terrain around the new portals and retaining walls is complete with rocks and painted.

The new portals have turned out great.

The walls have their basecoat but still need weathering and plants.

Gonna need that bridge real soon.

Very pleased with how the rocks have turned out, this was my first attempt at modeling rocks.
I collected some small, rough and irregularly-shaped rocks, partially wrapped them in aluminium foil, and the rock is removed. This makes the mold. Plaster is poured and left to dry.
When removed from the mold, the casting is glued into place and the edges are blended into the terrain with more plaster.
Once all was completely dry, dull brown and yellow acrylic paint washes were randomly dabbed on.
A thinned black was was added over that to make it all the right colour and bring out the details.
It wasn't easy, as this was mostly trial and error but they look great to my eye, they just need some greenery and perhaps a tiny bit of white, drybrushed over the rough bits to highlight them.

The road still needs to be painted but that aside, most of the scenery painting is done.

The wiring is complete, so I can finally run trains and test the track.
I'm adding a temporary bridge made of wood so I can run around instead of back and forth.

10/06/14
The control panel.
There is still some minor wiring work to be done here - to tidy it up, once I can get another green switchboard, and a decent train controller. The old controller on the left will stay, to power the point motors.
The control panel.
There is still some minor wiring work to be done here - to tidy it up, once I can get another green switchboard, and a decent train controller. The old controller on the left will stay, to power the point motors.

I'm sick to death of not being able to run around my layout, hence the temporary bridge. With this, I can play trains until I buy the proper bridge.

Months after building and installing the ash pit, I can finally test it now that the wiring's pretty much done. It works very nicely.

The messy wiring above the table is an eyesore, but I can cover it up.

The idea is to do the wiring before you start the scenery, and although I knew it would make it more difficult, I made do with what I had at the time
At least the wiring actually works, that's the main thing.

It's not easy soldering wires to the rails without melting the sleepers! Ah well, hide it with ballast then the time comes.

It was nice to break out the Richmond loco for testing, haven't run this loco in nearly six months.

The road has had a basecoat of paint, some track ballasted, the ash pit filled with real coal ash, and of course most of the grass added.
Starting to look much more complete!

I decided to experiment with colouring sand and using that as track ballast, to save money.
The fine sand was put in a jar with a weak acrylic black wash, thoroughly shaken, drained and spread on a piece of aluminium to dry.
It seems to work quite well, think I'll be using sand for the rest of my ballast.

27/06/14
Ballasting the track starts with making sure the track is clean, free of dust, etc.

Ballast is applied with a teaspoon..

Spread with a finger, and a small, clean paintbrush is used to gently remove the ballast from the sides of the rails. 'Shoulders' for the track are then formed.

Points are a right pain to do, you have to be very, very careful not to get any granules in the moving parts or the point won't move properly.
Of course, ballast WILL get in the moving parts and it's very difficult to remove them, half the time you can't find them.

The ballasting is nearly done on this section.
Using a fine mist spray bottle, the ballast is soaked with water to help the glue mixture soak in - it also stops the glue from washing the ballast away when it's dribbled on.
A 50/50 wood glue/water mix is dribbled onto the ballast, soaking thoroughly.
Leave to dry for a day or two. Very durable.

Point motors can be covered up with ballast, scenery etc.


The ground cover is done similarly to the ballasting.

A 2 parts wood glue to 1 part water mix is liberally brushed onto a small to medium area..

..And my dirt/grass/undergrowth etc. mix sprinkled on and left to dry for about two hours..

..Once dry, a look at the new ground cover will determine if more grass is needed.
Regardless of that, the area is soaked with the water spray, and the 50/50 glue (same mix as for the ballast) is liberally applied to properly stick everything down.
Like the ballast, this should be left to dry for up to two days.

The bridge has been painted, but the track needs ballasting and brick abutments sill need painting.

28/06/14
A crossing for railway staff has been built at the front of the table.

The ash pit road is nearly done. Track ballasted and cinders added where needed.
Crushed up real coal cinders are perfect for this.
Those bricks around the front of the pit still need painting.

A house will go here, on that bare patch of ground.

Really happy with this.


The turntable really needed this ballasting round the edges, looks way better now. The timbers around the edges of the turntable are matchsticks.

The main yard at the front has had more cork roadbed added to fill the gaps.

03/05/2015
After a long break (for the most part) through the hotter months of 2014 & 2015, I decided it was cool enough to get back into the layout.
Here, I'm finally getting round to making and fitting fascia side boards to the layout. I put this off for over a year because I wasn't sure how to cut the 3mm MDF straight. It wasn't that hard, just use a jigsaw along a pencil line, then clean up with a rasp.

07/05/15
Here's the last panel that needed to be fitted; This is how they were done..

The area was measured, and rough dimensions marked on the MDF in pencil.

The MDF is clamped onto the layout with vice grips. (at the time of writing I had no clamps)

The holes for the nails are found, marked and drilled slightly undersized for the nails.

Nails are driven halfway in, enough to hold the MDF to the layout in the exact spot it needs to be.

Then the contours are marked where the existing terrain is. I really should have done the fascia before the scenery was started, but it's not much harder now.

The board is then cut out, holes cut where needed for tunnel access, nail holes are countersunk so the heads sit below the surface, then the panel is cleaned up with a rasp. Then, on the panels with tunnels behind them, the inside face of the panel is painted with "El-Cheapo" black acrylic paint.

Construction adhesive is applied to the area the panel will cover.

08/05/15
The panel is nailed into place, and the erm, flaws, are covered with gap-filler putty, then sanded.

08/05/15
500,000,000 coats of the same El-Cheapo paint later, and the surface is almost done. Aside from painting over this subsequently-added filler that is.
The flaws in the panel are brought out by the camera flash, they don't look nearly as bad in person.

The hatches are made mostly from offcuts and scraps from the fascia panels. They need painting on both sides. The hinges were done with satin spray paint and glued on with construction adhesive.

The fascia is done, apart from cleaning up the excess glue that had dried before I could remove it.


It's certainly not pretty inside but it does the job.


Now the terrain can be brought out to meet the fascia and the scenery can really start moving forward soon.

I pulled out my crap homemade trestle and will replace it with a laser cut MDF kit I bought at the Caloundra Model Train Show on 11/04/15.

03/05/15
Finally, a reliable diesel!
I bought a lot of things at the 11/04/15 Caloundra show, including this Alco RS-2. The RS-2 & RS-3 are some of the very few diseasles I like.
This particular one is from Life-Like's Proto 2000 line. It cost me $55. Not bad, although I will replace the incandescant hedlights with warm white LEDs at some point.
I also got the turntable back together and working!


The last few months have seen some big milestones for the layout.
1. In November 2014 I bought the 18" long bridge and completed laying track, so I could run around the layout as intended.
2. At the same time, I bought a decent power pack that actually gives me some control over the speed of my trains! I can now run my locos nice and slow.
3. I got a decent diesel loco, so I can run test and goods trains.
So I now have a reliable (and not stupidly fragile) locomotive, and a decent power pack. So I can finally test my track and rollingstock for faults and correct them.
Now that the scenery's started it will be harder to make adjustments to the track, but back when I started the scenery, I didn't have a decent loco or power pack to test with.
The track is mostly good, but of course there are numerous adjustments to be made, and there is about 6" of track in the yard that is dead

Also in November 2014, I bought some long-needed buildings. The station and water tank are both Atlas kits. They both need a little more detail work and weathering before they're done.
The station comes with several names for the station nameboards. I chose "Oakland" - hence, this will be the Oakland branch line.

The goods shed in the foreground is another November 2014 purchase.
The yard trackwork is almost done, I just need to finish painting the track, then ballast it and conceal the point mechanisms..

I'd been needing a standpipe for the loco depot for a while now, and I was never going to scratchbuild one. This is a Tichy Train Group kit. very happy with how it turned out..

I cleaned the entire layout, track and wheels thoroughly, so I needed a way to keep it from getting covered in dust and dirt again. This is in the garage after all where a lot of other messy work is done (Mostly by me).
I bought some dowel and a 90c plastic drop sheet.

The dowel was cut to length, the ends rounded so they won't rip through the very thin sheet, then put into 10mm holes in the layout. It takes two people to add and remove the sheet.
The dowel holes in the scenery will be covered by bushes when the layout is in use.

The removable dowels will serve to keep the sheet away from the fragile trees and details.

I need to get some thumbtacks to pin up the excess sheet..

My friend Anthony and I went to the 2015 Brisbane Model Train Show on Saturday 9th of May.
I spent $67 on this lot, and that was cheap for hobby shop prices! I think I'll stick with my local supplier in Cooroy from now on..
I love those Woodland Scenics tree kits as they look good, they're easy to make (though tedious for forests!), and they're pretty cheap. This bag of 36 trees worked out at less than $1 each! Can't wait to get started making them when the time comes..

23/09/15
I was finally able to use my airbrush for the first time, to paint the track again. I had painted most of the track before I layed it, but the painted surfaces were subsequently damaged during construction.
Ballasting is also underway again, with about 2/3rds of it done.

Ballasting the tracks around the turntable was done with my dyed sand mix, followed by ash, spilt coal, and weeds.

The track was first airbrushed with a 'timber sleeper' mix I made up, and once dry, Nato Brown was painted on the rails and other 'metal' parts.
I decided to buy "proper" ballast now that I can afford it, and used up most of my dyed sand around the turntable. The remaining sand was mixed in with the ballast to give it a less uniform look.

Filler was applied where the fascia meets the scenery, then painted with the sleeper paint as an undercoat. The new trestle was also installed.
I'd been experiencing no end of problems with the road cracking from the board still flexing a bit when it was raised and lowered.
I found some flexible, apparently sandable water-soluble filler in an op-shop so for $1 I thought it was worth a go. It seems to work pretty well, though I have yet to sand and paint it...

The yard trackage still needs some attention but it's looking good so far.

The rest of the track has been ballasted, and the scenery around the trestle is almost done. New abutments were made of (you guessed it) matchsticks with a couple offcuts of rail as uprights.

That flexible filler stuff goes on okay, but won't sand very well at all. I will need to find another way to do it..


14/10/15
Bought this little log cabin kit by Model Power. Sure their stuff can be pretty cheap, but this one turned out quite well with some painting and weathering...

The rocks and tunnel portals were repainted as I wasn't entirely happy with them. The tunnel portals have recieved two coats of a thin black wash to bring out the detail in them.

The creek also needed some paint work following fitting the fascia boards.
Preparations are being made to pour the 'water', such as gluing more coloured sand, and plaster "stones" on the banks.

I still need to put some rocks, fallen trees etc. and a culvert pipe in the lake before pouring the first layer of water..

I decided to try and make a textured road surface with fine sand, try and fill the bumpyness with baby powder, then sand fairly smooth and paint to look like asphalt.
Bit of a crackpot idea but I'm running out of options for the bloody thing..
Also the retaining walls got several more coats of paint.

The truss bridge got 'a little' dirty with the roadworks.

That's it for part 1. Part 2 Here.