Working out at just twenty Australian dollary-doos each, I think they're one of the best bargains in garden railways today. I bought my first one back in 2016 as an experiment, and it's come in handy in track construction/maintenance numerous times since. Virtually every narrow-gauge line had at least a few tipper or "skip" wagons at some point, so I've had a long-term goal to build a rake of these things.
Now, I'm building three of these wagons simultaneously, but painting/weathering each one a bit differently for variation. One will be lightly weathered, one moderately, and one heavily. Sometimes during the process, the wagons will look very similar to each other. To this end, the photographs will show all three in the varying stages of work.
The instructions are simple and concise. Due to the simplicity of the kits, this article will be more about the modifications and weathering to which I'll subject them.
The majority of the kit is injection-molded ABS, with the wheels and axleboxes made of a nylon and fibreglass blend, for long life. There is very little casting flash to be removed, which is nice.
The kit is available in 32 & 45 millimeter gauges, the only difference between them being a narrower frame and shorter axles for the 32mm version.
The wheels are 16mm diameter, which comes out as a scale 12". While that looks quite good, it means the coupling height is far too low for my locos and other rollingstock. To lift the tipper frames up a bit, I use 24mm dia steel wheelsets from Roundhouse bogeys on other wagons. I had them spare after swapping them out for Binnie 24mm curly-spoke wheels. The addition of larger metal wheels lends some much-needed weight to these wagons.
The Roundhouse wheels need their paint removed and filthy treads cleaned.
The parts have all been cleaned up ready for assembly. I'm not going to babysit you through the simple build process, so let's move on to preliminary weathering.
The weathering on these wagons was mostly trial-and-error, but it's very difficult to fuck up.
As tipper wagon buckets tend to get pretty beaten up (unless they're only carrying sand or soil), I'll be using a butane pencil torch to soften the plastic, enough to bend and distort sections using my fingers and a flat-blade screwdriver.
Now, there isn't much one can do wrong when distorting one of these, but I must say: This stuff is fairly thick, and needs a lot of heat put into it before it'll soften enough to manipulate. But, you'll need to be careful not to keep the heat in one place too long, as it's very easy to make the surface of the plastic bubble and melt, while the material underneath still isn't hot enough to bend. Careful use of a heat gun is also ideal.
The amount of distortion possible could be as minor as this:
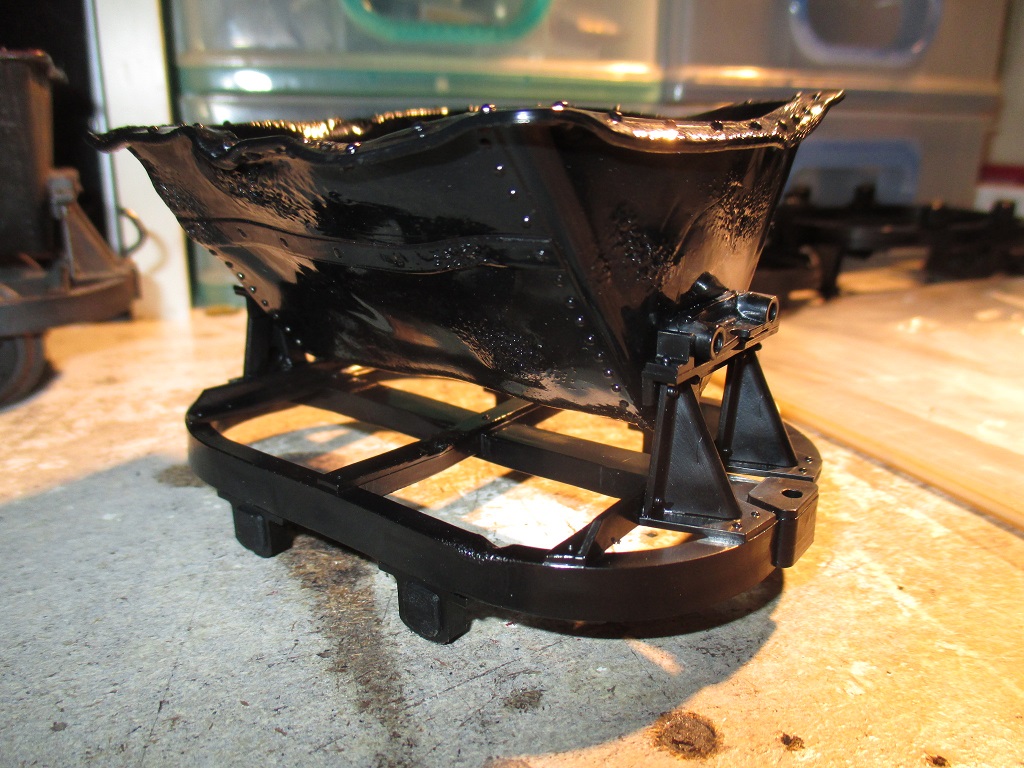
Or as drastic as this. I'll admit I went a little overboard with this one. After the photo was taken, the rim was straightened up a bit. The frame was also distorted a little, but I had to be careful it wasn't too distorted, so it'll still run well. I'm going for a "rolling scrap" piece here.
Note the melted bubbly-looking sections - again, be careful not to overheat.
The partially-melted bits were sanded back a bit, and a couple of dummy patches cut from .005" styrene sheet and superglued on here and there.
Buckets primed. I've sprayed a coat of filler primer on the beat-up one to disguise the melted bits. The insides are yet to be sprayed.
After being primed inside and out, and allowed to dry for a day or two, I can really jump into the weathering process.
Something I've been messing with for a while now, is using real rust.
Shown here in a spray paint lid, is some very fine iron powder. This is available from chemistry suppliers. I got mine in a 100g packet on Evilbay, which will last you a very long time.
A component is sprayed with a brownish colour. Gloss or matte is fine, the wagons will be matte clearcoated at the end anyway. On the heavily-weathered one, I'm using cheap
"Australian Export" brand enamel,
"Indian Red".
The base colour for your project will also work, depending on how heavy you want the rust to look. Or, if you want to add rust over an existing paint job, clear paint would be ideal.
The iron powder is very carefully and
sparingly sprinkled onto the wet paint, preferably over something to catch and reclaim the excess. This is
generally done one side at a time, otherwise the paint would dry before you get to it, causing the powder to not stick properly.
I try to "streak" the iron on in the direction of rainwater runoff, and concentrate in areas moisture would collect. A small, broad, stiff bristled paintbrush is ideal for streaking and spreading the iron. Don't be afraid to blow away the excess.

The beat up chassis has also been heavily treated.
A fairly even dusting for the exposed steel of the buckets.
After all components to be rusted have had the iron applied, the paint is left to dry for a few hours. Once dry, gently tap the parts against something firm to remove any loose powder.
If you've missed spots and want to add more iron, it's best to do it later on..
For now, spray the iron moderately heavily with vinegar, preferably in a fine mist sprayer to minimise droplets forming on the surface of the model. Any vinegar will do. Water also works, but is
much slower..
This wagon is the lightly weathered one, the iron powder having been applied to the black topcoat colour, rather than a rust colour..
After spraying, leave the vinegar to do it's acidic work and evaporate. Come back in an hour or two, and you'll find the iron has started to rust. At this point, the rust is likely very orange-looking. If you're modelling very new rust, you could stop there.
The more times you give it the vinegar treatment, the darker and older the rust will look. As always, it pays to test on some scrap first.
The medium-weathered bucket, on the beat-up frame - my mistake.
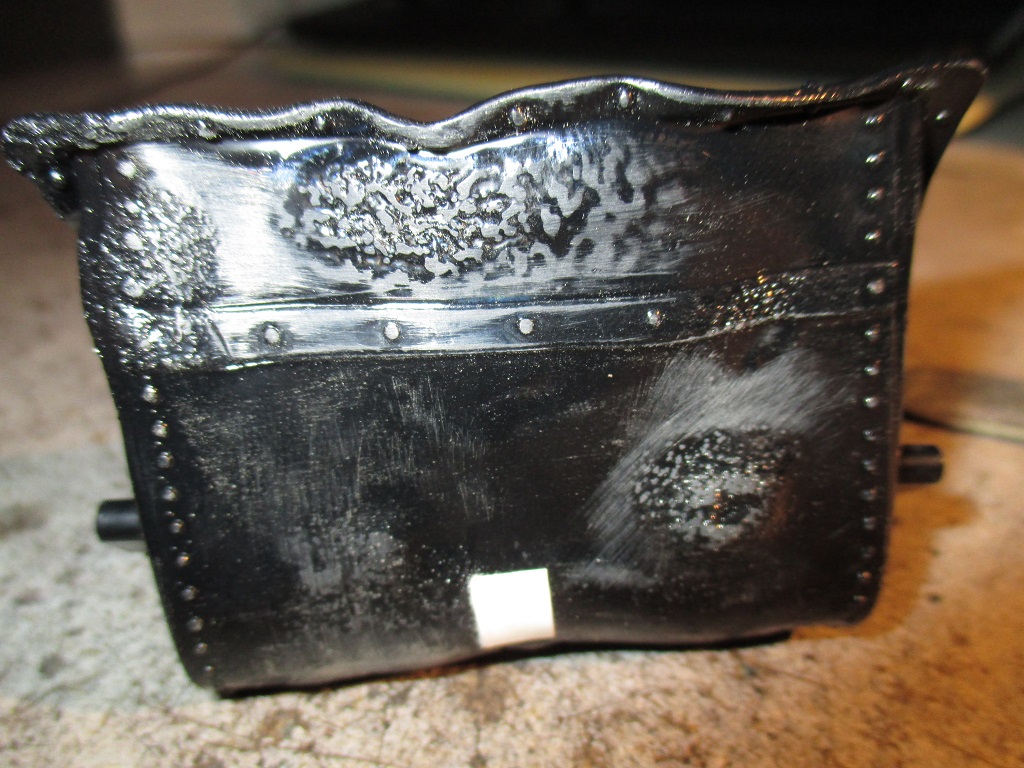
3-4 sprays of vinegar later, and it's looking very nice. To my eye, it's still a bit bright in places though. A coat of clear paint tones down the colours nicely. If you missed anywhere when applying the iron earlier, now's the time to apply some more to those spots before the clearcoat dries.
Medium frame.
After a clearcoat, the colours are much better, with traces of black paint here and there. At this point I found the wagons were falling apart as I didn't use enough plastic solvent sticking them together - the instructions warn of this. Mating surfaces were cleaned up and superglue was used instead.
I try to avoid superglue for structural joints where possible, because it's a very brittle and relatively weak adhesive. Though, for this, it'll likely be fine, I'm pretty careful with my toys.
At this point I was happy with the rust, but decided I wanted peeling paint as well. So I went for the "salt-chipping" method:
1. Grind up some table salt with a mortar & pestle. You want the consistency to vary between uncrushed grains, and powder.
2. Moderately spray the components to chipped, all over with water in the fine mist sprayer, again to stop large droplets forming.
3. Sprinkle the salt on the wet components, focusing where you want the topcoat of the paint to look chipped away. The salt sticks to the wet surface. Allow to dry.
4. Once thoroughly dry, and without disturbing the fragile bond between salt and model, spray your final paint colour over the model. Allow to dry. I used a flat black enamel paint, which would withstand the next part of the process..
5. Place parts in clean hot water and allow to soak for a few minutes. Then start scrubbing the salt away with stiff-bristled brushes. While wire brushes will remove the salt much faster, they'll also make your project look like Wolverine's attacked it - I've made that mistake before.
The salt acts like tiny flecks of masking tape, lending a peeled or chipped look to your final coat.
At this point, you could employ weathering powder, drybrushing, or even do another layer of rust. Besides a light overspray of matte black, I was happy to stop here..
..For the most part. Some areas like inside the buckets, needed another hit with the rust treatment here and there.
Clearcoat, iron and vinegar applied..
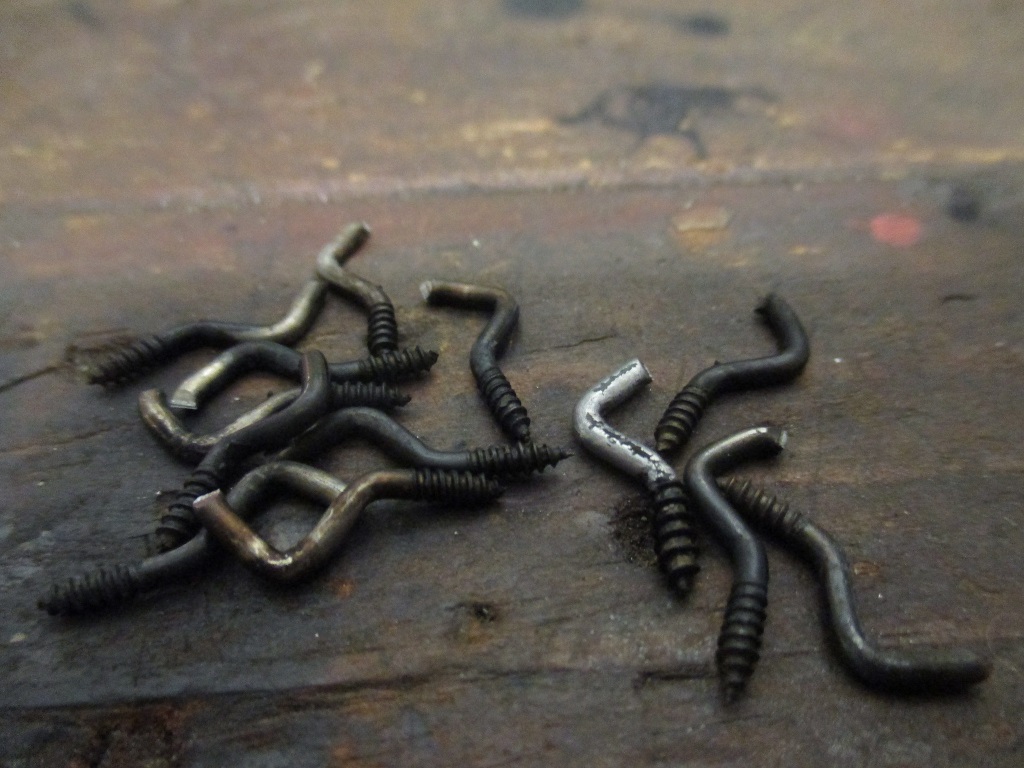
For ease of use, I make my own coupling hooks similar to those found on most 16mm scale equipment.
If I'm not using commercially-available couplings, I use picture hooks because they're available in numerous sizes and have a threaded shank which helps them
not get ripped out of their mounts.
Small parts like these are a great for using up those butane cans, when they get too empty to fill a loco's gas tank.
While it's still glowing orange, quench in used engine oil. New oil also works, but not nearly as well. Repeat for a better result.
If the world wasn't full of fuckwits, I wouldn't be compelled to mention the importance of ventilation for this..
After removing it from the oil, gently burn off the excess (without getting the hook red hot again, that negates some of the treatment)..
..And set aside to cool.

The heat also anneals these brass-plated steel hooks, which makes cutting them and adjusting the shape that much easier. Run them through the heat and oil one more time to blacken the cut surface.
These hooks' shanks are a bit small to screw into the wagon frame, so KS Bond (a very strong and rubbery contact cement I like) will have to keep the hooks in. That
should work. If not, I'll have to get some bigger hooks and modify/fit those.
It doesn't show up on camera very well, but I've added some gloss black around the bottom of some axleboxes to represent their not-unusual oily patches.

After recieving the same paint/rust treatment as the frames and buckets, corresponding wheels were also given the oil effect.
In addition to a light overspray of flat black, the wagons were all gone over with a coat of Tamiya flat clear, as a final topcoat. This caused a few small patches of rust to turn white-ish. (air trapped under the clearcoat?)
A wash of Tamiya Nato Brown (my go-to rust colour) was touched into these spots, in addition to a streaky application inside the buckets, and around their top flanges.
Numbers were painted underneath for identification. Of course they could've been done where they'll be visible, but I don't see much point - I doubt a sugar mill would be organised enough to number just four skip wagons.
With the wagons complete, I'm obligated to take some ex-works photos. I leave the buckets loose.
My first, moderately weathered skip is at the back of this little rake. At $20AUD each, I'd certainly buy more of these, but the extra cost of Roundhouse 24mm wheels would, I suspect, double the price per wagon. For now, I'm happy with four. They'll look particularly good behind the Malcolm Moore, perhaps with a flat wagon and/or cane truck, loaded with Navvies and their gear. Shit, I should build a
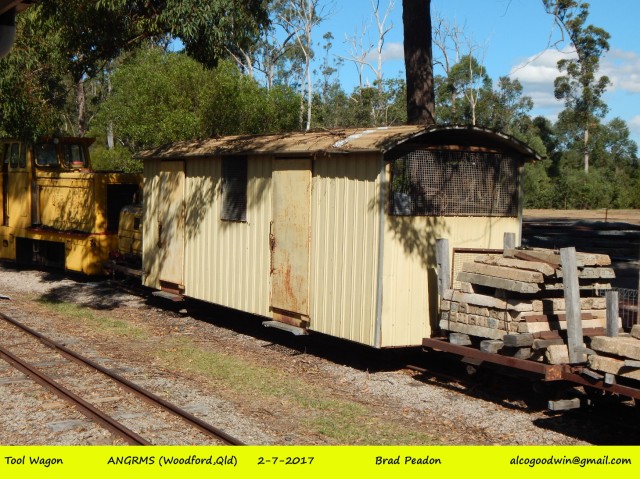
Moreton Mill style tool wagon to go with these..
Besides an actual test run (instead of posing on a garden line I no longer use), there's two final things to do - first, add the wagons to my records. This is a simple text document that anyone can make.
I have one for my garden gauge stuff, and one for HO scale stuff. Both split into separate sections for locos and rollingstock respectively, in order of acquisition.
Any repair, modification or maintenance is recorded here as part of the work being done.
Can't remember where I got the idea, but it's been immeasurably helpful. I'd make a blank version available to download, but as far as I can tell, Blogspot doesn't seem to allow that.
And secondly, the wagons need safe storage. It's a bit quick-and-dirty, but I made up a box from cardboard and packing
tape. With a large rubber band to keep the lid on in transit, to and from other railways, this is quite adequate for wagons of this size and weight.
In closing (and speaking strictly as a happy customer), these are excellent, high quality kits at a very good price. I cannot fault them, and would recommend them to anyone looking for a skip wagon, or even as a cheap, simple chassis for scratchbuilding.
I hope this was of some use, thanks for reading.


