Quite late in updating the blog, unsurprisingly. It's been a particularly busy few months.
Following on from Part 1..
25/05/20
Trench-digging continues, with frequent trips to the back of the house, to dump the spoil. Wouldn't mind having some 1:1 scale portable track and a few skip wagons right now..
Trench-digging continues, with frequent trips to the back of the house, to dump the spoil. Wouldn't mind having some 1:1 scale portable track and a few skip wagons right now..

08/06/20
The gravel roadbed is about done, as is the planting at this end. The van's not far off, either - should be living in it by this time next month.
The gravel roadbed is about done, as is the planting at this end. The van's not far off, either - should be living in it by this time next month.


For now, I'm leaving most of the plant labels in place so I can keep
track of what I've planted. Once they're more established and stable, I
can do away with the labels.

After watching others do battle with it from this side of the world, for
some years now, I finally found some of the dreaded MYOB/babies' tears
at the nursery the other day. $15 a pot wasn't cheap though, so I bought
two - one was broken into clumps and planted in a couple of BBQ trays
to propagate. The other was planted whole, behind the van in full shade,
and the surrounding area given a "top dressing" of good potting mix.
I'd like to give it a good start so that it might thrive in spite of our
sweltering, windy summers.

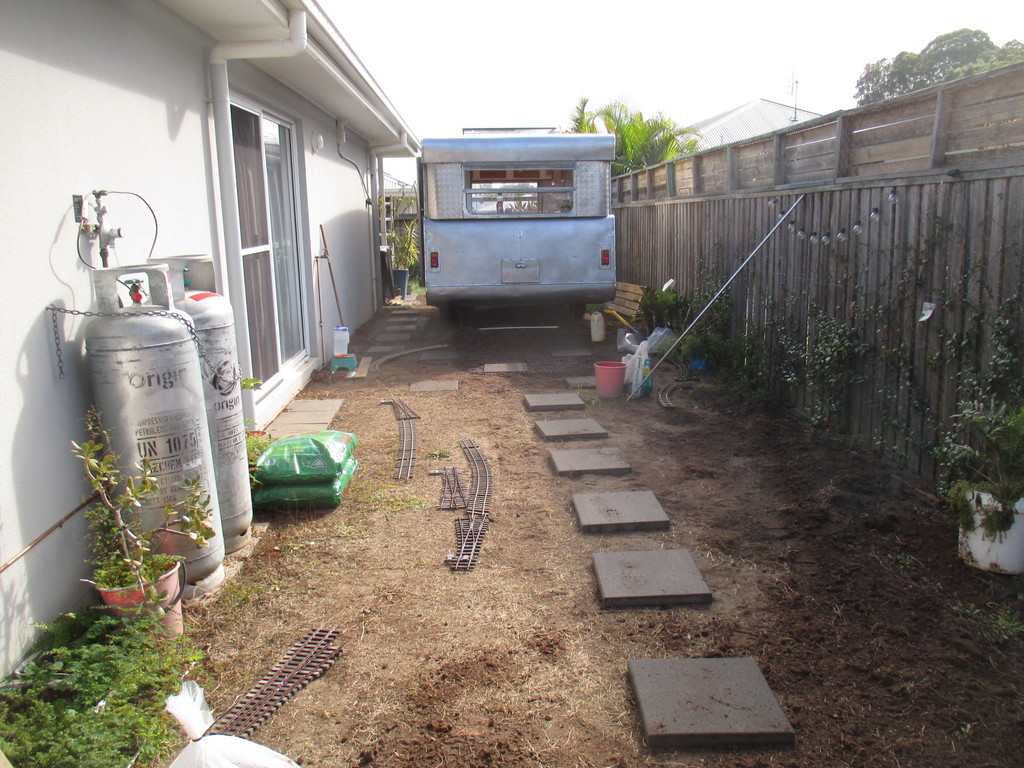
Some more planting along the West (house) side. The plants in front of
the gas bottles are in a plastic window-sill-type flowerbox, which sits
in a gravel and brick pit. The edges are then covered over with mulch.
Having forgotten to photograph it when I was building it, I'll get a
photo when the box is removed next time a bottle is changed out. Still
need to build a portable ramp for the bottle trollies..

These hardy shrubs will obfuscate the
air-conditioners. I'll be keeping these trimmed and in their pots, for
if and/or when the aircon units need access for servicing.

13/07/20
After the final push to complete and move into the van, (always minor teething issues to iron out, though) I was able to return to the garden. This time round, I'm allowing some weeds to grow, rather than constantly chasing them. They help fill in the gaps, and they look after themselves. Anything too obtrusive (in the way or with large leaves) gets pulled, though. This toilet vent is also obtrusive, being adjacent to the future alignment. I have a suitable building with which to cover this, whilst allowing airflow to continue.
After the final push to complete and move into the van, (always minor teething issues to iron out, though) I was able to return to the garden. This time round, I'm allowing some weeds to grow, rather than constantly chasing them. They help fill in the gaps, and they look after themselves. Anything too obtrusive (in the way or with large leaves) gets pulled, though. This toilet vent is also obtrusive, being adjacent to the future alignment. I have a suitable building with which to cover this, whilst allowing airflow to continue.

Had a bit of a sort-out before moving my things into the van, and found
this forgotten slab hut I'd made some years ago. We'll see how it holds
up in this fairly sheltered spot under the eave - it's only made of tongue
depressors and pine, coated in polyurethane..

19/07/20
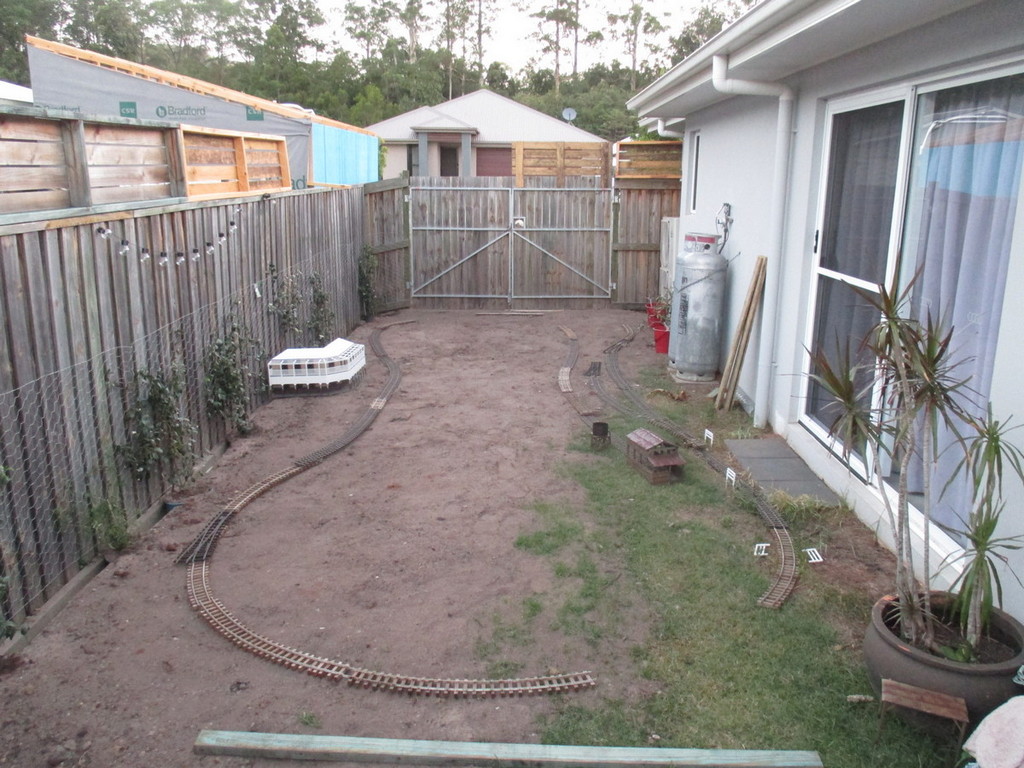
After having moved into the van, I was finally able to move the larger palms around this side, sinking their pots into the ground to allow some chance of taking them with us one day. I was using them as privacy screening outside my bedroom window, to compensate for the substandard back fence. With the palms in place, locations for a few buildings and further planting could then be better determined.
After having moved into the van, I was finally able to move the larger palms around this side, sinking their pots into the ground to allow some chance of taking them with us one day. I was using them as privacy screening outside my bedroom window, to compensate for the substandard back fence. With the palms in place, locations for a few buildings and further planting could then be better determined.

The neighbors finally pulled their fingers out and fitted their
guttering yesterday. I've only been waiting eight months to fit those
remaining fence extensions...

Predictably, the North face of the cutting under the van is prone to
washing out, due to the rain running down the ends of the van.
This photo was taken after I'd cleaned it up; might make some sections of log cribbing for the problem spots, or look at re-directing the runoff
This photo was taken after I'd cleaned it up; might make some sections of log cribbing for the problem spots, or look at re-directing the runoff

The ground around the Northeast corner of the van is currently being
levelled off, so that it looks
presentable when we eventually move out..
I also realised that, whilst this line is still primarily intended to be a test track, let's be honest: I will be having fellow modellers over to run trains.
And we all know there can never be enough siding space, even when there patently is.
To that end, a yard and possibly a running shed, will be built on a low elevated section along the fence at left. Connection will of course be via the earlier-mentioned line alongside the van. I'm calling this "Phase Two", and will get to building it when the current work (Phase One) is running. I'll have to find spots to plant these excess shrubs..

With that, "Phase One" is about ready for the navvies to get their collective arses out of the pub, and do their thing.


21/07/20
Starting from the middle of a curve isn't ideal, but because the garden is so small, there's little room for error in track alignment. So it made sense to start with a spot I need to be accurately-placed.
Besser block caps provided a solid foundation for the South crossing. Some large flat-blade screwdrivers make reasonable "stakes" with which to hold flex track in shape - and quite good for packing gravel between sleepers. The cordless drill is also nice to have, this time 'round.

A battered 1980s Stainz, crudely converted to battery power using leftover bits and a
PWM speed controller poking through the roof, makes an ideal track tester. It's
nice not to worry about chipping paint, or other damage with this loco.
Poor old thing will get a proper rebuild, one day..

No derailments yet. Only using enough gravel to merely support the track
- it'll be ballasted proper with a mix of crusher dust, sand, cement
and oxide dye.
Not sure if the weather will allow more track work tomorrow, but it's nice to just watch the little Krauss trundle about this short section.
Not sure if the weather will allow more track work tomorrow, but it's nice to just watch the little Krauss trundle about this short section.

Cheap pavers are split in half with a hammer and cold chisel; simply to
stretch money. These are spaced every 2-3ft, the track being screwed to
them via wall plugs.

It was getting dark, so this one's a bit blurry. A butane torch was
indispensable for removing stuck rail joiners with (gently) vice grips.

27/07/20
Another few yards are down, allowing for the first train on the tramway. The Mk.1 wholestick trucks are on test after repairs.
Another few yards are down, allowing for the first train on the tramway. The Mk.1 wholestick trucks are on test after repairs.

The line to mid-right will be laid as part of Stage Two.

28/07/20
The bridge in the Southeastern corner of the yard will be built from cedar. When I built my handlaid track some years ago, I set aside a bundle of sticks ripped down from cedar planks, for use as point and bridge timbers. The term for of milling both sides of a log, so that it doesn't roll away, is unknown to me, so I'll just call them "paralleled" logs. A pair of sticks had two sides each, whittled down to resemble "paralleled" logs. Whittling's rather enjoyable, though I don't see myself carving anything more than miniature logs any time soon..

A scale grain effect was added with a wire brush.


30/07/20
The crossings have all been concreted. In the initial batch, I used leftover gravel from the pathway, which was unsurprisingly too coarse for use between the rails. That was dumped elsewhere as fill, and a new batch mixed using crusher dust instead. The first crossing turned out very nicely. We'll see how it holds up once cured..
The crossings have all been concreted. In the initial batch, I used leftover gravel from the pathway, which was unsurprisingly too coarse for use between the rails. That was dumped elsewhere as fill, and a new batch mixed using crusher dust instead. The first crossing turned out very nicely. We'll see how it holds up once cured..

31/07/20
Once the crossings had turned "green", flangeways were carved out with a screwdriver. The edges of each crossing were straightened, and the surfaces of the second two smoothed, somewhat. During mixing, I'd forgotten to add some brown oxide to tone down the starkness, so I thought I'd try mixing some oxide with water, and brushed it over the partially-set concrete. How it turns out remains to be seen.

Just to see how it looks, some crusher dust was spread over a short section. Looks great, but certainly too well-maintained in appearance. Will pack this lot down a bit, paint the rails, then apply the aforementioned "proper" ballast mix, in time.

01/08/20
The remaining bridge parts have been made, and the stringers cut down to suit the curve where the bridge is to be assembled. Pre-weathering the components with the vinegar and steel wool method. In the past however, I've found that not all types of wood are affected by the treatment. Another pre-treatment deals with this - soak the parts in tea, and allow to fully dry, prior to the vinegar bath. Whilst I have stained cedar with the vinegar method, I don't remember weather it needs the tea, or not. Easy enough just to do it anyway.