Continued from Part 1.
20/06/19
Next to do; some railings. Now, matchsticks would've been perfect
for the vertical pieces, if they weren't made of warpage-prone wood. A couple
packs of 2mm square styrene rod were bought instead.
Of course,
I needed them all cut exactly the same length. I've neither the money
to buy things like a NWSL Chopper, nor the energy to build something
equivalent.
A similar jig to that used earlier, for cutting square tube to ½" lengths was made. The 208 verticals were cut to 40mm long.

21/06/19
After
many hours of distressing each piece, they were assembled on another
jig, again made from scrap material. Revell's "Contacta" solvent cement was used. The horizontal rails are 2.5mm x
4.8mm styrene. All up, these railings are working out around $45, thus
far the single most expensive part of this project.

While the glue of one railing panel dries, the panel made before it is trimmed to snugly fit it's own space.

The
rails are left a few millimeters over-length, marked in pencil, trimmed
back with the razor saw, then sanded to a snug fit - just enough to
hold the panel in place, without distorting the posts.

A
small arrow in permanent marker is made on the top rail, so I know
which way is up, and which is the front side. This is because the length
of each railing panel is slightly different, to nicely fit it's
intended space between posts.

As
each post has it's own place, they'll need numbers underneath so I know
where to install them once painted. A small conical diamond burr in the
dremel was used to carefully engrave numbers underneath each panel's
bottom rail. I coloured the grooves with pencil, to make them
easier to see.

01/07/19
After no small amount of sanding, the rail panels are ready for cleaning and paint.
After no small amount of sanding, the rail panels are ready for cleaning and paint.

After super-gluing some verticals that had come loose, the panels were cleaned with meths and a new toothbrush, then hung on a line of tie wire.

Difficult to see in the photograph, but the primer was left to cure for 24 hours.

02/07/19
A simple jig was made up from scrap styrene to spot drill the doorknob holes. I'll be using sewing pins (the ones with spherical heads) as doorknobs.

After the hole locations are spotted, the jig was removed and the holes drilled through.

A test fit shows the drilling accuracy isn't as good as I'd like, but it's not noticeable at normal viewing distances. The pins will be cleaned, painted and trimmed before fitting.

04/07/19
Having bought some paint for the verandahs, I remembered they'd need Scotch-Briting prior to masking off.

I used the wrong masking tape here. This stuff is too strong, and tends to lift the cream paint, in places. Too late now, so I'll try and get the painting finished as soon as possible and get the tape off.

06/07/19
This is weird. after the first coat, the aluminium reinforcing bars are showing through the paint from underneath. Never seen anything like this. I doubt it had anything to do with the temperature of the bars, as it was all painted and dried in the shade of trees. Two more coats and the floors were all uniform in colour and paint thickness.

11/07/19
After a couple days to cure, (and some new low-tack masking tape to finish the job) the floors were masked, and the fascia readied for white paint.

12/07/19
Despite losing a little more of the cream paint when removing the masking tape, it's come up very nicely.
As for the name "Imperial Hotel" emblazoned across the fascia, I'm going to try doing a proper signwriting job of it. I've done a lot of fine, fiddly paintwork over the years, including some lettering with ordinary enamels. I've ordered some small pots of proper lettering enamel in preparation.
Needless to say, I'll not be practicing this on the model - I'll scribe and paint some scrap styrene to match this fascia, and have at it..

The sewing pins have been painted black. A "worm" of Blu-Tac holds them in place on a wooden stick.

15/08/19
It was a cold, very dry day when I sprayed the railings white last month. When I returned to recoat them, I found the sprayed paint had dried before it hit the railings, resulting in that awful rough, grainy finish. Considering the huge total surface area, and the prominence of the railings, this was a disaster. The paint had to come off, so I started trying the usual plastic-safe stripping methods.
Several days, to a week, soaking in isopropyl alcohol, did precisely nowt to the epoxy enamel - works okay on normal spray enamel, though. Then a week in Simple Green, which had caused some minor paint bubbling - still not good enough. A week in meths - no better than the alcohol. Moving house didn't help in getting this done.
Finally, I tried oven cleaner on one panel. What a difference that made, with no damage to the styrene. Some "wispy" residue of primer was left behind, but that's no issue. It does attack superglue, though, so the previously-repaired verticals fell out while scrubbing.
The panels were then repaired where required, cleaned and repainted in the previous manner.

29/08/19
A wash of white spirits, black and brown flat enamels was applied to the floors to bring out some detail. This was done again several days later.

22/09/19
The gloss brown paint needed a flat clearcoat to look right, and as I'd heard of people in Pommyland using Humbrol enamels on their 16mm buildings, I thought I'd try spraying Humbrol's Flat Clear over the existing brown paint. So I sprayed all the top level's doors, thinned with white spirit.
This was the result.
Yes, I mixed it properly, and yes it's the new stuff made in the UK. I also used Humbrol's Satin Clear on the platework of my Accucraft Ruby during it's overhaul at the time. It had a similarly-disastrous effect - And I tried that with two different tins of that shit.
Subsequent further internet research revealed that Humbrol seems to be incapable of making a consistently-useable paint - their clear ones in particular. So I binned the various 6 tins I had, returned the two brand-new tins for which I had a receipt, and switched to Tamyia's enamels, as I've been using their acrylic range for years on general work, with absolutely no problems.
These doors however, had to be brush-repainted with the gloss brown, then spray-clearcoated with Tamiya's X-22 Clear, flattened with their X-21 Flat Base.

04/10/19
Railing panels repainted, I could finally clean the paint from the ends of the rails (for better adhesion) and glue them in place.

Using offcuts of the 4.8mm wide rail material as spacers.

Once all but one of the rail panels were fitted, the last panel could be trimmed to final length and painted.
I then started on the verandah's roof structure. I was going to "tack" it together in-situ, then remove the tacked assembly for spray painting, prior to final fitting. But I changed my mind and just glued it to the tops of the posts as I went along, and will brush paint the assembly later on.

A conveniently-sized scrap of smaller square tube was used as a splint to join the 6mm beams.

6/10/19
I was going to complete the verandah roof's framework first, but figured it would be easier to build the removable main roof now, rather than later.
Using some scrap material to mock up some roof angles, to see what looks about right. This should do.

the dimensions were scribbled down and transferred to some foamboard.

Because the ½" PVC angle used to stiffen the rear walls isn't quite square, Some scrap styrene strip along here, will make this top flange square, with the top of the corflute. This will provide a good footing on which the roof structure can locate

08/10/19
All the trusses made up to fit their own spot, and they locate nicely. As usual, the parts were tacked with superglue, then glued properly with KS Bond. 2" reinforcing lengths of ½" angle are helpful here.

16/10/19
The large panels were measured and cut to suit their respective positions, then sparingly fitted to the trusses with KS Bond and superglue.
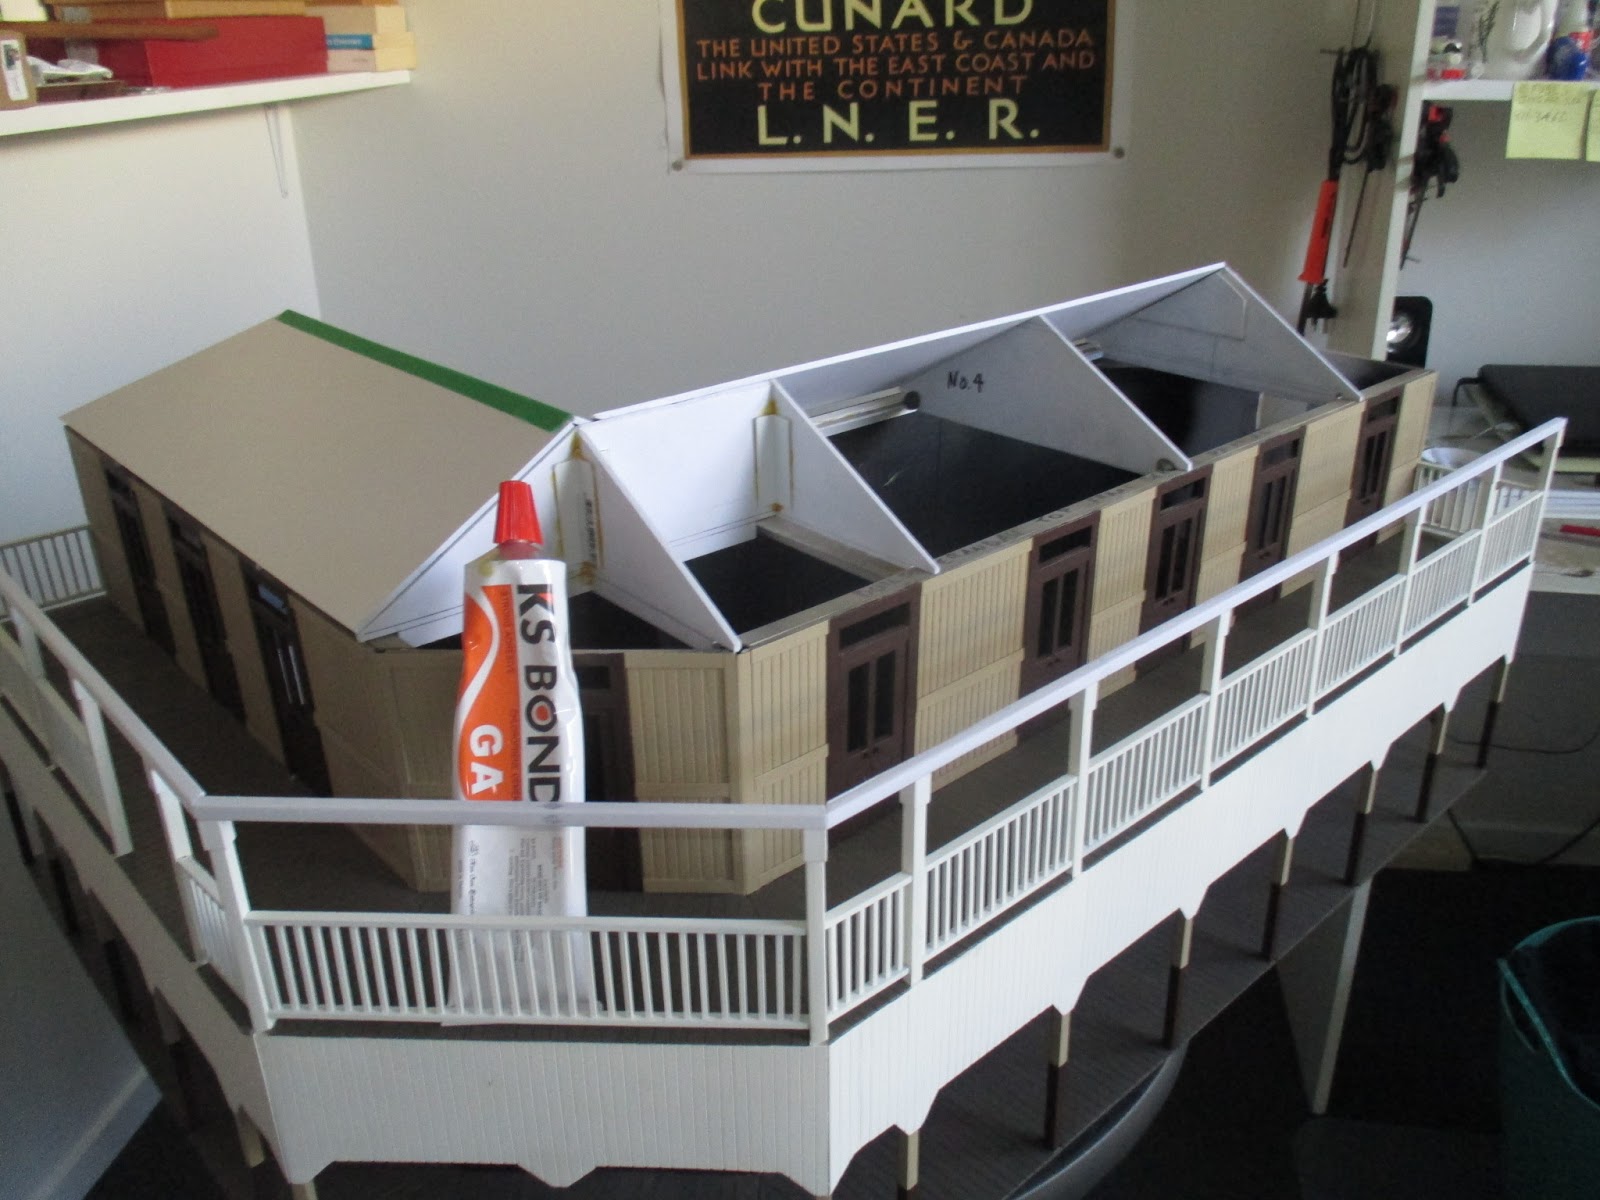
After the roof panels had an hour to set in-situ, the roof could be flipped over and the insides of the joints glued.

26/10/19
A verandah rafter was cut from 6mm square tube, and used as a pattern for the rest.

Three faces of the rafters were distressed, and fitted with superglue.

The centre lines for the purlins were marked, the purlins themselves cut to ¼" wide, from 1mm styrene, and their undersides distressed.

28/11/19
It's taken a month to hand paint the verandah frame and rafters - one coat of primer and four coats of white, to cover properly. The purlins were then fitted, though I've not painted them. The slight difference of colour won't be noticed.

On the final straight now, albeit a long one of many jobs left to do.

02/12/19
As I said back at the start of this build, I really didn't expect to be living somewhere I could build a new railway. Long story short, a deceased extended relative left me a few thousand dollars, with which I'm buying an old caravan. After some repairs and modification, I'll be living in it full-time, starting early-mid next year.
The house we moved into some months ago, is in one of those new, cheaply-built, yet hugely overpriced "crammed-in-like-sardines" shithole estates. Truly detestable places.
This place is a temporary measure for us, while we save up for a house deposit. The idea, is to live here only 2-3 years, but I know reality doesn't work like that. I expect we'll be here for at least five years, so I'm going to transmogrify this tiny, barren sloping yard into something livable.
Part of this, will be a small railway, (12ft x 30ft) mainly as a test track, but also for trying further scenery & structure ideas. Here, the pub is roughly in it's future place, to help in establishing the future track layout, as part of spadework for the caravan.

That's part 2. Next installment will the last, covering the windows, roof, lighting, signwriting and final detailing. I'll link it here when it's done - whenever that'll be..