The first iteration of my first garden railway
Warning: Extremely long, rambling post ahead
Athough Australian Model engineering Magazine published an article I wrote about my first garden line, a condensed version of my Farcebook album of same is more suitable for a blog posting..
At the 2012 Xmas party of the Sunshine Coast Railway Modellers Society (SCRMS) in Nambour QLD, I met a fellow named Anthony, who had a G gauge live steam loco. An 0-4-0T Ruby loco by Accucraft. It caught my eye because I'd seen a Ruby in Peter Jones' book, Building Small Steam Locomotives, a few years prior. We started talking and it turns out that like me, he's into sugar cane trains, specifically steam. We've since become good friends. It was then, that I decided I wanted one for my 18th birthday next year..
Since I met Anthony, I'd started researching Ruby locos and live steam in general.
Come my 18th birthday in November 2013, I had my Ruby. It's Butane-fired and has a working pressure of 40lbs. Valve gear is smple eccentric with piston valves. Reversing is acheived with a central piston valve under the smokebox. The Ruby is a basic, beginner's loco highly suitable for kitbashing.
After a year's research, I knew the Ruby inside and out by the time I got one. I knew exactly how I wanted to personalise it, what issues to look out for and how to fix them. When I got it, it more or less looked like this:

Less than a week later, I had the thing in bits modifying it. Hell, as you can see above, I'd already replaced the standard numberplate on the smokebox before taking the "as new" photo!


A couple weeks later, the loco was repainted into a livery reminiscent of the now-closed Moreton Central Sugar Mill, in Nambour QLD. Living in the region for most of my life, I remember seeing the cane trains and the mill when I was little - that's where my enthusiasm for cane trains comes from. A dummy headlight, turbo generator, whistle and safety valves were made from bits in Dad's junk boxes - mostly from aluminium and high-temperature superglued together. I also added a trailing wheelset as I felt the standard Ruby is screaming out for one. That's just a standard Accucraft part. I scratchbuilt the rollingstock a few months before I even got the Ruby, based on Mapleton Tramway prototypes.
I like the Pommy practice of naming locos, so eventually I settled on "Baron". Weirdly enough, she's named after the villan in a childhood Playstation game I've long enjoyed, Jak & Daxter. Somehow, I think the name fits the aesthetics of the loco..
I like the Pommy practice of naming locos, so eventually I settled on "Baron". Weirdly enough, she's named after the villan in a childhood Playstation game I've long enjoyed, Jak & Daxter. Somehow, I think the name fits the aesthetics of the loco..

By the time I got Baron, Anthony had built a Fowler loco kit, from Roundhouse Engineering in Doncaster. Now I wanted one of those, too! The Fowler is in fact based on a fullsize sugarcane loco, now preserved at ANGRMS Woodford where I currently volunteer.
We ran our locos at the SCRMS track, in the gap between the 5" and 7¼" gauge rails. Obviously, we couldn't run over the points, and the gauge on the curves varied too much for these much smaller models, but we had fun running back and forth along the straights.
We ran our locos at the SCRMS track, in the gap between the 5" and 7¼" gauge rails. Obviously, we couldn't run over the points, and the gauge on the curves varied too much for these much smaller models, but we had fun running back and forth along the straights.

Of course I knew I'd need to build a proper track, at home. That's just an inevitability..
17/07/2014
The Fat Cuntroller starts contruction. Now I had no income at the time, save for birthday and Xmas money, so it was always going to be a slow job. The method of building the roadbed was found on Youtube. I found this series on building a garden line to be very informative, and the methods used are very cheap, easy to build, and suitable for the annual coastal downpours I get.
The Fat Cuntroller starts contruction. Now I had no income at the time, save for birthday and Xmas money, so it was always going to be a slow job. The method of building the roadbed was found on Youtube. I found this series on building a garden line to be very informative, and the methods used are very cheap, easy to build, and suitable for the annual coastal downpours I get.

Bricks to which the track will be fastened, were scavenged from empty lots, alleys and construction leftovers. The route was then marked out.

A trench for the roadbed, about 5" wide and 4-6" deep was dug.

1-2" of gravel and sand was placed in the bottom of the trench for drainage, followed by the bricks.
The sand and gravel were from a soccer field parking lot, and a man-made lagoon respectively, both a short bicycle ride from home. I brought eveything back by the bucketload on my bike
The sand and gravel were from a soccer field parking lot, and a man-made lagoon respectively, both a short bicycle ride from home. I brought eveything back by the bucketload on my bike

The bricks were then packed around with more gravel and sand, then packed down and leveled.

Digging the trench was made harder by weed mat, tree roots, and irrigation lines that nobody actually uses.

The shovel is at the future site of the dry creek, hereafter referred to as Anzac Creek.

Due to the non-existent budget, the bridge over Anzac Creek was made from whatever I could find. The stringers are cut from a spare rake stick, the pile caps are hardwood offcuts from the light-up scrap box at SCRMS, and the piles themselves are debarked paperbark sticks.

Having no money for decent materials nor perservatives, the bridge parts were heavily painted with grey primer. The parts were coloured with an acrylic "weathered timber" paint mix I had leftover, and given several coats of decking oil.

By 02/08/14, the trackbed is done. I was originally going to buy premade track with aluminium rails and UV-stabilised plastic sleepers, but just the circuit (not the points or sidings) would've come to over $200. These days, I wish I had gone that route, but money was far tighter back then. I went with something cheaper..

I considered making Anzac Creek functional, but that would've required money. Having it as a dry, seasonal creek was good enough. However, as a future post will show, it can be done surprisingly cheaply..

An ashpit made from concrete blocks. The shed road will go over it, with the carriage siding running next to it, parallel with the garden edge. The idea was to make the ashpit useable for any visiting coal-fired locos. It turned out to be a useless pain the the arse because it'd just fill up with leaves.

The cat-run has always been an annoying obstacle. In early 2018 it was dismantled so the house could be repainted. (Our cats are indoor only, and we had to build the thing for that little black turd. When she was little, she would get bored, then run about and trash the house. After we built the cat-run, she then spent most of her time lounging in the sun in there. She's since outgrown being a little shit all the time. I fucking loved that cat)

Handlaid track is the most affordable option, so that's what I picked. A friend from SCRMS lent me a set of handlaid points to study its contruction. I ordered 30 brass rail joiners and 19 six-foot lengths of Sunset Valley aluminium rail from Argyle Loco Works in Melbourne, VIC. At the time, the rails were $8ea, joiners were $1ea.

Sleepers were made from planks salvaged from a broken outdoor table someone left on their curb, and hardwood scraps from the SCRMS light-up bin. To this day I've no idea what kind of timber any of it is, but some types of wood have fared much better than others.

The first section of track I made was the carriage siding. I figured if my first bit turns out poorly, it's only a siding and not the mainline. It's time-consuming, but it came out real well..

..Well enough to jump into the set of points at the end of the siding. I printed out full-size photos of 2ft radius points (biggest radius I can fit in this sardine-tin backyard), and glued sleepers on top, using the picture as a template.

The point timbers were numbered in sequence to make contruction quicker and easier.

At this point I was using the dremel with it's little cutting disks to cut the rail. When I eventually broke the last of the fragile disks, I used sidecutters (dumb move) and cleaned up the nasty deformed edges with the bench grinder and files. In hindsight, it's obvious I should've just used the hacksaw and finished with a file..

As the rail is aluminium, it's soft enough to bend by hand sometimes in conjunction with pliers. No expensive rail-bender for me!

I was gong to make a normal, bladed set of points, but I decided that would be too hard, and made stub points. In hindsight I've realised making bladed points would be no harder than making stub points, and would be less problematic than these shitty stubs turned out.

First one was pretty crude, but aside from alignment issues with the stub, it works well enough.

Dogspikes are 15mm nails with half of the heads ground off. Track gauges were made from 3mm thick aluminium.

First section of track installed. A masonry drill bit is used to drill a hole in the bricks/concrete blocks in the roadbed, a wall plug hammered in, and the track is screwed down through pre-drilled countersunk holes in the sleepers. An engine shed is being made from hardwood scraps and popsicle sticks.

13/09/14, and the second set of points is made, along with the moving stubs for both. The track has been ballasted with a mix of gravel, sand and dirt to encourage moss growth. A Lego mockup of a Malcolm Moore loco (a future project) is being used to test the track. Seems ok so far..

One reason the stubs didn't work was that the tiebars were all superglued to the rails. It really needs to be a mechanical joint rather than a glued one. Quite frankly, this is dodgy and half-arsed as fuck. It wasn't until 2017 that I got around to remaking this trash with threaded rods holding the rails at the right gauge. Dirt, leaves and other shit do still get under the rails and further fuck up the rails' alignment.
Stub Points: Never Again.
Stub Points: Never Again.

Sometimes tracklaying continued into the night. Note that some of the rails have been brush-painted with Gloss Indian Red which over a few months, dulls down to a nice rusty brown. This was a bastard to do once the track was fixed down. That said, I couldn't do it before laying the track, as ballasting would've scraped it all off, especially being aluminium rail.

6/10/14. The last spike is finally being driven. I briefly considered painting it gold, but then realised I wanted this tracklaying over with, and in my book, a gold spike is a bit of a cliche at this point.

Baron testing the track. Most of the track was ok, but all the points were fucking nightmares.
The major issue was her burner being typical Accu-Crap. Accucraft has a reputation for their locos (and particularly their burners) being very hit-and-miss. My burner was self-extinguishing very frequently, and would always burn in the smokebox rather than down in the firetube where it's supposed to. This was really starting to piss me off. In my extensive research of Rubies, I'd read about all kinds of issues and possible fixes for AccuCrap burners. I tried:
* Different brands of butane fuel,
* Enlarging the hole in the base of the smokebox, to provide a freer passage of exhaust gases and reduce back-pressure on the burner,
* Thouroughly cleaning the entire gas system inside and out, multiple times,
* Countless adjustments to the gas jet holder's position in the burner boss,
*Adjusting the air inlet on the burner boss,
* Filters in the gas line,
* PTFE tape on all gas fitting threads to make certain that air wasn't leaking into the gas line,
* Putting fine stainless mesh around the burner tube,
* Tin baffles in the smokebox, to keep the heat away from the whitemetal headlight bracket,
* Putting a coil spring inside the firetube to force the gas flame to swirl in the firetube rather than burn in the smokebox. Only this had any affect whatsoever, but the issue persisted.
There were other things I tried, but as you can see, I tried so many things over a long period, I can't remember it all.
By mid 2015, I found yet another possible fix. The described symptoms were the same as mine: Burning in smokebox and constantly going out. The cause turned out to be the wrong gas jet being fitted. It was a No.5 jet, with a 0.20mm orifice, when it should've been the smaller No.3 with a 0.15mm orifice. That's all it takes for a burner to play up. Thanks a bunch Accucraft, great quality control! Maybe something that costs $650 should work properly out of the box? What a concept!
I bought a No.3 jet from The Train Department in the US. Cost me all of $15AUD inc. shipping. Once fitted, the issue was *snaps fingers* gone. The loco was finally some kind of useable.
But it shouldnt've taken dozens of hours of fiddling, research and extra money spent to make an already expensive machine work properly from new.
Sorry about that, rant over.

The loco shed was clad in popsicle sticks, and half-arsed popsicle roof trusses made.

It then had a coat of thick, gloopy "weathered wood" paint mix.

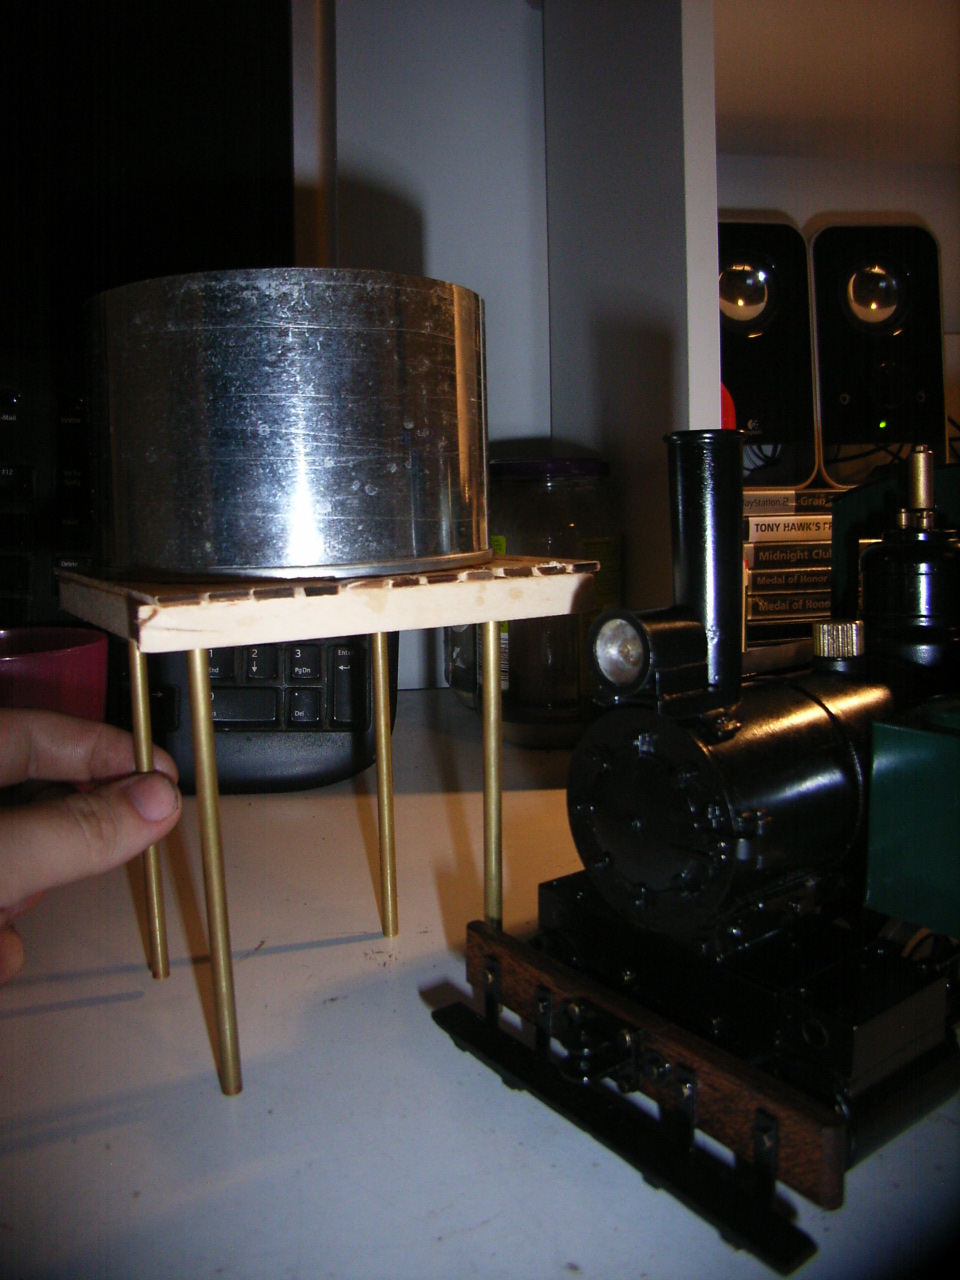
A water tank was made from stuff on hand: 5mm brass tube, a beetroot tin, a couple inches of rubber tube, and as ever, popsicle sticks. All held together with liquid nails, superglue, and treated with decking oil after painting.
I actually had to shell out some money for this! Outdoor pva glue for the coal pile. The coal itself was some poor quality shit we didn't like to burn at SCRMS so that was free. The tray it's all on is from an icecream sandwich!

I was anxious to have some friends over to play trains on the new tramway, before Spring ends. Gets to +40°C pretty quickly around here. Doesn't help that I'm less than a mile from the beach, so it's always humid.
So I set a date to invite some friends and members of SCRMS over, for the 18th of October 2014.
This was a dumb move, as it didn't give me enough time to troubleshoot the track and make sure everything actually worked.

My friends brought over an interesting mix of locos and rollingstock, but we soon found almost nothing would fit through the rock cutting, as it had been made to clear my relatively small Ruby.
Here, Anthony's Accucraft IOM coach and Peter's Accucraft Superior sit in the carriage siding, too big for the admittedly undersized loading gauge.

Earlier on, Anthony's Adelaide Loco Works Krauss 0-4-0T, hooked up to a Scientific Toys open wagon, the IOM coach and Anthony's MSS loco, try to get around the track.

The inner curve of the East station points was too tight for Baron to get around. Rubies are happy with curves of down to 2ft radius - that's the outer track. The inner track was more like 18" radius, so it should've been obvious to me that Baron wouldn't like it. Additionally, my homemade stub points were hopelessly unreliable, with everything consistently derailing when passing over them in either direction. On top of that was Baron's burner being a cunt, as previously ranted about..

It was a bitterly disappointing day, but I brought it on myself. I took a break from the garden line for a month, and put some time into HO layout No.2, then under construction..
I'd
decided to do away with the passing loop, because of the radius issue, and the points at either end were the
ones really causing problems. It took a lot of fiddling, but I got the points leading to the locoshed/carriage sidings to work well enough. An angle grinder makes quick work of cutting the rails without having to pull up anything else.

The points at the east end of the loop were fixed solid into the outer track position, and the point lever removed. I left the rest of the point there as it would be very difficult to remove the unneeded rails without ripping the track up.
Now it looks like there was a siding here that became disused, and they ripped up the siding and didn't bother with the point. I've seen it on the real thing, so I can live with this..

At the other end of the passing loop, I wanted to keep some of the passing loop as a siding, so I had to get the point to work properly. It took a lot of fiddling and reinforcement, but it now seems to work quite nicely pushing a bogey wagon through it, though I haven't tested Baron over it yet..
However, derailment problems persisted here so these points were soon locked too. You'd think those awful gaps in the rail joints were the cause of the problem - it was actually because it's a reverse curve, made necessary by the tiny garden space. Even with the points locked and the rail gaps filled, this spot was always a source of derailments..
I didn't really use the siding for anything other than storage anyway. I can still park something on the siding, but "Hand of God" shunting has to be used.

I used an angle grinder to cut two sections of scrap auminium channel to size, and test fitted them under the rails in the ashpit. They need painting and gluing into place. The ballast at either end can then be finished.

The station platform would be brought outward to use the mainline. It was made of hardwood blocks (again from the lightup bin, that thing was always overflowing), glued end-on-end with a popsicle stick and balsa fascia glued round the front and sides. Dark sand I found at a building site was then glued on top, to look like gravel. One idea for the now siding was for it to service a goods shed or livestock ramp.

Now I had to find a use for 3'6" of spare track..

17/03/2015
As the weather gets hotter and even more humid toward the end of the year, I tend to focus on work I can do in the air conditioned house. Buildings, locos and rollingstock are what gets worked on during the hotter months.
I had been looking for something to rebuild into a station for Anzac Creek. I didn't want to be so amitious to build something from scratch. Eventually, I found this at a cheap shop in Nambour for $10.

Roof, door and window removed, front and back walls cut down to final height. Side walls were also cut down to the peak height of the roof.

18/03/15
Using a jigsaw, then a bench grinder and dremel to finish, the roof profile is made.

18/04/2015
Baron's had some improvements recently:
*The valve timing was reset to inside admission after a lot of trial-&-error. (I won't explain the whats and whys of Ruby valve timing here, as it'll take too long and Google has the info)
*Modified Roundhouse crossheads & slidebars fitted (thanks for those, Anthony)
*The headlight's been rebuilt and fitted with a 3V LED (I quickly found these won't work in the hot enviroment of a live steamer, and promptly replaced the LED with an incandescent bulb) with X2AAAs in the right side tank,*Smokebox braces have been added,
*I pinched the original brass boiler bands to fit to my Mamod traction engine, so I made some painted steel replacements for Baron (I don't want brass bands on her anyway),
*Front steps were removed (kept getting bent/broken in derailments),*New hook couplings to replace the pain in the arse link-and-pin couplings,
*Homemade chuff-amplifier pipe from 5mm brass tube, inside the smokebox,
*Green paint on the cab & tanks was chipping off badly because I didn't know you need etch primer when painting brass, so when I stripped and repainted the things, I went for a nicer warmer shade of green. Before, it was British Racing Green. Now it's Brunswick.
The weather's cooling down, and with the track recently made serviceable (Fuckload of trial-&-error there), so it was time for the first proper running.


The line's bedding in after a few months, and the garish new sleepers look much better now. Existing and new plants are slowly filling in the gaps.

This reverse curve continued to be an occasional issue, but careful control of the loco minimised the problem.

The carriage siding was extended by 18" using a section of the redundant station passing loop; It'll now fit all four of my current wagons. A small junkyard was also started behind the shed. Surplus rail corrugated bean tin scraps, popsicle-stick planks, plastic caboose ladders and even a a fullsize dogspike I found, from the local Moreton cane tramways. No doubt this will be expanded over time.
I also planted some Moreton sugarcane to the left.

The loco facilities are holding up ok so far in the hot, humid, occasionally stormy weather.


The line up to the rock cutting was much steeper than it looked. Live steamers don't like hills - Locos needed a lot of regulator to pull a train up it and get around the tight 2' radius corner in the cutting. They'd then fly down the other side of the hill, often derailing on the reverse curve at Anzac Creek. A few months later, this section would be pulled up and relaid with a much less severe gradient. Running improved all round after that.

The rock cutting was inspired by the numerous rock cuttings of the Buderim Tramway, also local to me. I can't remember, but I think this photo was taken shortly before I widened the cutting to accomodate visiting equipment. Note the runners from the sword ferns creeping down the rocks and into the ballast. I regret planting these things, they are so very invasive. But they look good and they were free. Goddammit.


22/05/15
Another running day with mates was very successful this time, I even set up the HO layout in the garage. We ordered pizzas for lunch, burned coal in the brazier 'cause we all love the smell, everyone brought something to run, a very good day.
Here, my mate Ben has recently accquired an Auccucraft Ida (Mechanically same as a Ruby, only cosmetic differences), being coupled up to a train, while my Mamod TE1A "Anzac" ticks over on the platform.

Anthony's in-progress first effort at building Moreton Sugar Mill's Eudlo, a Fowler 0-6-0T. It's too large to clear the platform at Anzac Creek, so Anthony brought a loop of plastic track

Ben's Wilesco steamroller ran surprisingly well over the

The speed at which trains ran downhill from the cutting is apparent.

Normally my photography turns out like shit - got lucky with this one.

By this time I'd bought Anthony's MSS loco and was attempting to get the little bastard to work. After a few months I gave up, sold it and used the money to buy a diesel loco kit. Disposing steam for a diesel, the fuck's wrong with me? Haha.. I wonder if the new owner ever had any luck with it..

16/06/15
I've decided it was time to actually make this a sugar cane tramway. I was going to buy a couple square feet of turf, but that turned out to be more trouble than it was worth.
I ended up buying 3 pots of this "Sagina Subulata" grass, which is closer to scale than turf. I was able to stretch it by about 40% and get a 9"X12" field for $19.50. Not cheap, though.. By comparison, the turf would have cost about $3 for this field!
I've also added lots of other plants to the railway to give it a more "rainforesty" feel.

19/06/15
The
station windows and doorframe are scratchbuilt, while the plastic door
was cut with a dremel from a toy G scale caboose. The station livery is
based on Queensland Govt. Railways practice. It's just occured to me;
Why, oh why did I make the side windows that much higher? It's weird. I
should've made the roof one horizontal batten thing lower..
02/07/15
Plenty more plants have been added. Most have been dug up from alleyways between rows of houses in the older areas of town. I dont know shit about gardening, so when I need a plant for a particular spot, I make note of the amount of sun the spot gets, average moisture of the soil, sand content and so on. This information helps me find plants that'll work for a particular spot. Most of time though, the plant dies. I'd recently got my first job, so was able to actually buy a few plants. The bought ones of course have been raised and set up so they can be removed from their plastic pots and planted in the ground, so most of those have done quite well, long term.

I'm also trying to get moss growth started on the track, because it looks like scaled-down grass. Perfect for narrow gauge track. I've been scraping up 'pads' of moss from around the air conditioner's moisture drain out the side of the house. The moss is then torn up into smaller bits and mixed with coir peat (for moisture retention), sand, dirt, some cement and a little brown cement dye. This is a variation of "Rowlands Mix", a popular way of ballasting garden lines in Pommyland, because it lends an excellent narrow gauge look to the track. A few more months of watering and careful application should bring it up real nice..

07/08/15
I've made a typical farm fence around the canefield from 1/4" balsa and galvanised tie wire. It was a total cunt to install, and I'll never make another fence that way. That's all I'm gonna say about that.
I've also bought some bamboo reed screening stuff, and camouflage-painted it with various colours of spray paint. It was then fixed to the fence with heavy-duty staples. A huge improvement over the bare fence, in my book.

23/09/15
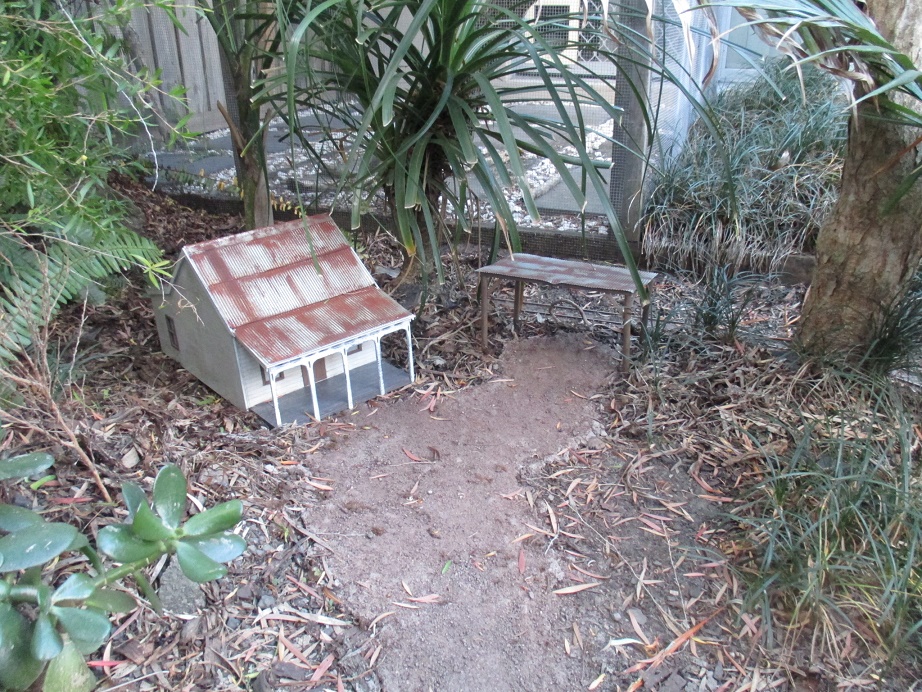
Another running day, and Anzac Creek's station building is done. Still needs benches, people and maybe a signboard. A couple of baby ferns were planted behind the platform for "prettyfication". They cost all of $2.70ea from Bunnings.

14/01/2016
The line gets pretty bad when I leave it during the hotter months. All the plants go nuts in the heat and humidity. My half-arsed locoshed and watertank are falling apart, too. I've patched them up a couple times now, will have to start designing better quality replacements. My first job didn't work out, so now I'm on the dole so I can pay my share of the rent. However, I have a little money left over, so I can buy the right materials and preservatives to do things properly from now on.

15/02/16
An attempt was made at track testing a rake of cane trucks then under contruction, but they were hopelessly light, so I posed them and Baron for some photos.


Used some online image editor to make this one.

For a while, I'd wanted a level crossing here, so I bought some more cement and used some popsicle sticks I had on hand and made this.
(Note to self, remove bamboo screen at end of road before concreting)

The road was 1:1 cement & sand, with some acrylic paint mixed in for colour.
I was doubtful of the water-based paint's ability to survive but worst case senario, I'd only have to fork out $15 for some proper cement dye and make a wash to put over the road.

I think the road is about finished for now, will see how it goes in the long run..

18/05/16
The last canefield was half dead from the inside out (not enough water over Summer I think) and I couldn't find more anywhere. Even to this day, I still haven't been able to find more.
Eventually I was able to get a slab of turf from Bunnings. I've 'planted' this section of the slab on top of some potting mix and coir peat to help it along. Not as nice-looking, but hopefully hardier.
A friend on Farcebook told me about this toy windmill he bought for $22 inc. post, and sent me the link to buy one, so I quickly snapped up the last one. I gave it a misting with the indian red spray paint to simulate rust but was never quite happy with that effect..
The farm fence was always a fucking nightmare to deal with. Anything from neighborhood cats, scrub turkeys to myself removing leaf litter from the track, windmill and "cane", would always damage it and it was a bitch to correct.

I'd made up a large batch of Rowlands Mix, but with a larger portion of sand and cement this time. I wish I'd made note of the ratios, because it looks fucking gorgeous, the moss grows well on/in it, and it's formed a nice tough skin impervious to washaways from the rain.

I've binned the disintergrating the old loco shed and built a new one in it's image, using the original's roofing sheets.
This time it's not made from offcuts and the timber has been coloured by soaking the parts in an acrylic wash for a better more natural finish.
I've also used outdoor PVA and a wood sealer to stop it falling apart outside. However, I'd made the mistake of treating every part with the oil-based sealer before assembly, so the glue couldn't properly adhere to the wood. Some parts had fallen off and deformed overnight. And this was with no rain, just dew! Very annoying as I'll have to somehow find space indoors to store it.. At least I don't have to constantly sweep the sand off/out, remove bug's nests and rebuild it when the weather eventually does wear it out. I also had the same outcome with a replacement water tank built at the same time. Like the shed, the tank was 90% new with proper materials.

I intended to detail the interior of the last shed but knew I'd never get round to it.
This time so it actually gets done, I made a point to do the detailing as part of making the building in the first place.

The cement-mix ballast was carefully built up around the base of the shed, then very carefully watered in. This leaves a nice "socket" shape in the ballast so the shed can be carefully placed and removed, and blend seamlessly into the ground. This "socket" has proven itself surprisingly resistant to damage.

The workshop area is different from the last, having that wall behind the workbench.
And yes, that's a 1:24 scale Ford flathead V8 under the bench, leftover from a car kit. Underscale but good enough. The red stain on the floor was a detail I added. Was meant to be spilled paint but it also looks like someone had an accident there. You be the judge


Not long after this, I'd decided I wanted to extend the line. Someone had suggested this back at disastrous first open day in 2014. I dismissed the thought for a while, but I knew of course it was inevitable. After permission from the domestic authorities (who were again surprisingly amenable), work started in June 2016. The extension has it's own blog post, but I'll cover the additional work on the original tramway to date, in the remainder of this post.
The idea was to make the original tramway ciruit into a balloon loop. The red lines indicate new track, while the black denotes track to be removed. I considered leaving the bridge in place and adding points to where the new line diverges from the old, but it would've required custom-built points. After all the trouble with my existing points, no fucking thanks, a balloon loop will do.

28/06/16
I started work by digging a trench for the timber edging near the current layout.
The original timber edging will be cut down to meet the new edge.
The new Anzac Creek bridge will be in the new section, this time with running water, as I'd realised how cheaply and easily it can be done. All that of course, will be discussed in the separate post..

12/07/16
I needed a more permanent storage solution for the buildings, plus the yet-to-be-built buildings needed on the extension, so I made two new shelves to go over the doorway and loco shed display/storage area in my room. At this point, my younger brother and I were still sharing a room, hence the posters.

31/08/16
I'd been focusing on building the other end of the extension, and the new garden beds it would all reside in, so the original line was left mostly untouched for a while
The joining area of the original line has been pretty much cleared out, with the old wagon siding re-shortened back to it's former length. I'm using Newqida plastic track for a lot of the extension, not wanting to handlay it all. There's reasonable evidence that this cheap plastic track does ok outside, so I'm confident enough to take the chance. Here, I'm working out where the new track'll go.
The loco shed will remain where it is, but the watertank and coal pile will be moved.
The original Anzac Creek bridge will come out very shortly as well. The bridge itself may yet be incorporated into the new design. See how I go I guess..

1/09/16
The original track over the bridge was cut with the angle grinder and pulled out, bringing half of the bridge structure with it..

..The rest was buried in-situ, due to the presence of redbacks hiding under the bridge. (which were sprayed anyway)

My el-cheapo materials and treatments were unsurprisingly inneffective. Whilst the bridge was still serviceable after 2 years, it would only have lasted 3 years at best. The pine broomstick stringers were in poorest condition, followed by the pretty much buried paperbark piles.

Camera's sitting on the site of the troublesome reverse curve. Good riddance.

1/09/16
The last of the roadbed has been built. The new arrangement is a gravel-bottomed trench as previously, but with $1 pavers spaced at 1-2ft, and dry-mix concrete surrounding it all. This will discourage weeds in the ballast. I doubt drainage will be an issue.
The old wagon siding (which saw little use) and the loco shed will become part of a steam powered bush sawmill, with the shed and sidings being owned by the sawmill co. A repainted LGB Stainz was accquired at a bargain some months previous, and it'll be based in the shed here as the sawmill co.'s beat up old loco. The Stainz will be hereafter referred to as "the Krauss", because the prototype was built by Lokomotivefabrik Krauss & Co of Munich, Germany.
The mill itself will be mounted on a board, and will be placed next to the siding (on the grass) during operating sessions. The area to be occupied by the mill may get paved to provide a decent footing..

The ashpit has been filled in. It was a pain to remove the leaves, and it never really felt right having an ashpit with a basic bush loco shed. Frankly, I doubt a small sawmilling company would even bother with the luxury of an ashpit.

The bridge area and remaining creek up to the fence was filled in.
The rest of the old creek will be left as is, as it's matured nicely. I may yet however turn it into a farmer's dam..

15/03/2017
Been a real long time since I've touched the original line. The navvies have their work cut out for them.


28/04/17
After deburring the cut rails in the orignal track, new joiners were slipped on in readiness for the old bridge track (now modified for it's new purpose). A piece of the old bridge is left roughly in-situ on the edge of the old roadbed as a reminder of what once was...

The orginal wooden platform at Anzac Creek was rotting and starting to distort, so some extra pavers were bought as a replacement to be finished the same style as the original.
The road had also been stepped on a few times by visitors I'd neglected to warn about, and had cracked badly, so the damaged section was ripped up and will be replaced. The rest of the road is in great shape.
By now, I'd had a gutfull of fixing that fucking fence so I binned it. If I ever build another farm fence, it'll be a bar-type fence, likely in plastic or cast resin..

30/04/17
As is apparent in the last photo, the moving section of the stub point to the sawmill was removed (with some help from a butane torch!). I was finally doing this stub thing properly. This time I'll drill and tap the rails and use threaded rod to hold the gauge..
The point levers were all removed to be cleaned up and repainted.

06/05/17
The new platform at Anzac Creek has had it's fascia added and the bricks glued together with the strongest stuff I have, in hopes it'll make it easier to move the platform from the workbench to the layout. I think I'll still put it on a plank when the time comes to move it outside..

I bought these benches on a Farcebook group 11 months ago. Only now getting them assembled!
They're laser-cut ply and acrylic. Got four of em, two for Anzac Creek and two for the big station on the extension. Cost something like $4AUD each plus a couple bucks post from the UK.

08/05/17
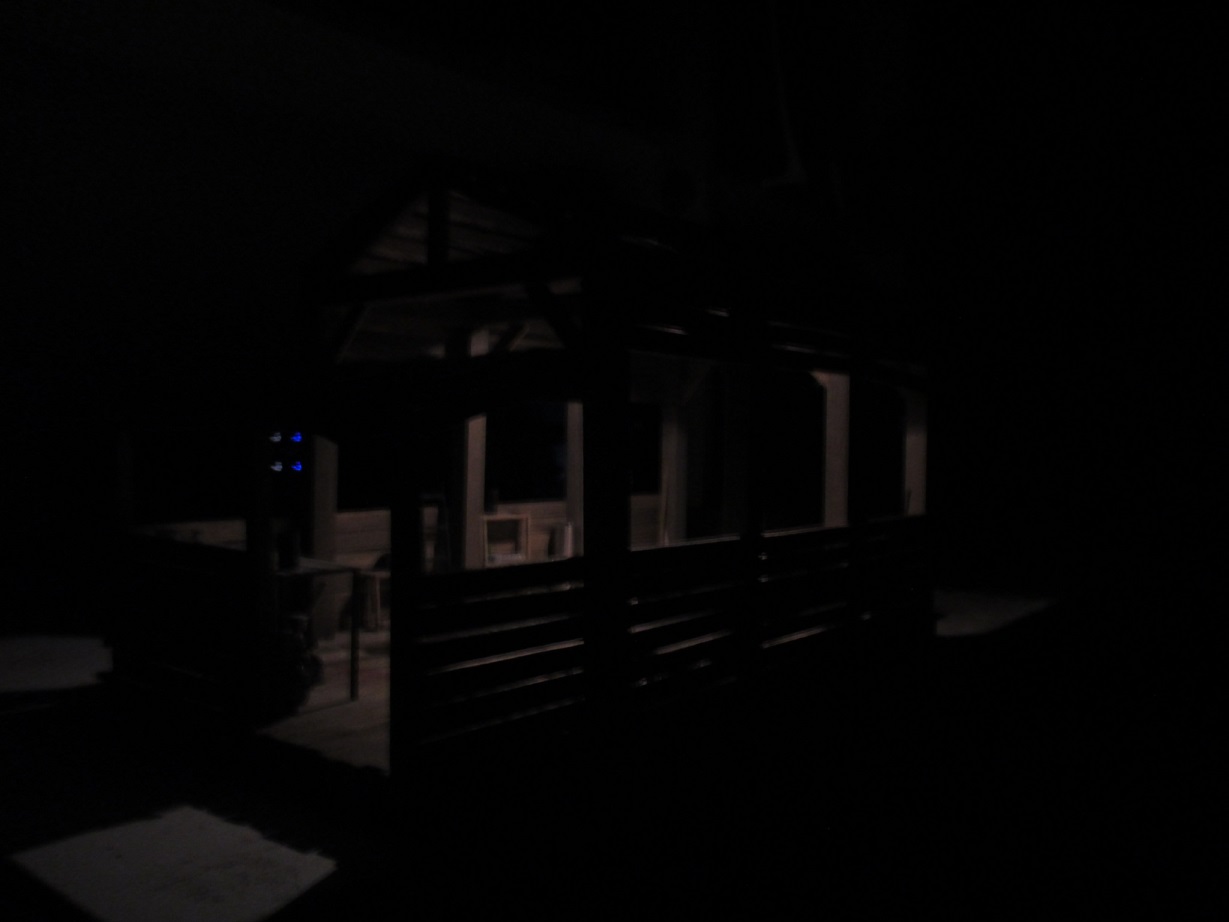
One thing I should've done from day dot, was lighting in the buildings. The sawmill loco shed has had lighting retrofitted and awaits some paint to finish up.

I figure the sawmill is too cheap to install adequate lighting, so I'm quite happy with the effect of just one lamp. X3AAAs under the workshop floor power the warm-white LED. The lampshade is an old toy wagon wheel.
09/05/17
The former bridge track has had it's check rails removed and the curvature adjusted to fit it's new use in virtually the same locoation. A fairly substantial embankment was required to get the track across what is left of the old creek gully..


The sawmill siding in particular has come up beautifully. Really, really happy with this. I've not even watered it. The moss gets a bit brown over the hot months but springs back when it cools down.

12/06/17
The new platform for Anzac Creek is complete and awaits installation. I was careful to use the best glues for the job, and thoroughly sealed it all with polyurethane. I then proceeded let it sit on the BBQ for a month. Fuck knows why..

20/06/17
The North end is occasionally getting attention. Connecting the original line to the extension is about 15 inches away. I'd always known I'd need to handlay some track for the extension. The points are Newqida, with a fancy paintjob, modified joining sockets and a centre-over spring to hold the blades in place. Annoyingly, for the spring to do it's job, it's too strong to allow the points to be trailed, so they must be thrown after a train passes over it. Otherwise your train'll derail when it comes back around. The sawmill yard's looking fuckin' A. Some areas will need patch reballasting though.

The point stub from Anzac Creek station. Threaded rod and a repaint have this ready to go and should finally be good long term. As mentioned earlier, the glossy indian red dulls down very nicely in around 3 months.

10/07/17
The original tramway is now a big balloon loop! Some minor reballasting in places will see the original track ready for a test run..

Only took me a month to install the new platform after it was completed. A new baby fern was also planted immediately behind the platform. More of them to come..

Upon close inspection I found the track here to be severely distorted.
A large root from the adjacent tree was the cause.
When I originally built the line, I remember seeing the stub of the root coming out of the base of the tree and thinking "this'll be an issue one day". 30 seconds with a hammer and sharpened wood chisel had the root dealt with.
The track was reballasted and and a beefy steel tent peg hammered in to help resecure the track. That bit took an hour..

After a couple years of trying to find a suitable plant to represent sugar cane, I decided to settle on the Mondo Grass that is already here.
Some trimming every few months keeps it looking reasonably "caney", and it's very hardy so it looks after itself.

The area once occupied by the original canefield was cleared of weeds and some surplus mondo plants relocated to start a new field. More will be needed..
The cardboard template is the footprint of a cottage kit I'm in the process of ordering.

About half of the rehabilitation work has been completed in the original garden.
The main job has been removing a shitload of the sword ferns due to their invasiveness, a job that needs doing 2-3 times a year! Note the tin outhouse near the siding, this was a (if a little overscale) sucessful experiment in making my own corrugated tin for buildings. At this point I was working out where I wanted to install it.

19/07/17
Sorely needed extensions to the building storage shelves have been added, almost doubling the storage capacity.

A laser-cut plywood house kit arrived this afternoon, shown here mocked up with blu-tac to get a feel for the size. Rather big in 1:24 scale!
It came with the corrugated aluminium sheeting for the roof, and extra doors and windows to be added as desired. Pretty good for $80 inc. post, at the time of ordering. I highly reccomend it.
It's from Tod's Models & Woodwork. I saw the kit advertised on a Farcebook garden rail group a few months previously. He makes other kits, in various scales and does custom work. (I've no connection other than as a happy customer.)

I've read about a method of helping ply be more weather resistant. Scorching it with a blowtorch and sealing with several coats of 1:1 water/outdoor PVA.
Unfortunately, I found the 3mm ply warped due to uneven heating so I only did the roof and veranda posts. Everything was then given 3 coats of the glue mix and allowed to dry, prior to assembly.

20/07/17
The walls and veranda have been assembled and first paint sprayed. I've added some blocks of scrap balsa near the top to help support the roof pieces whilst the glue dries. Just makes it a little easier. Roof will be one of the last things I do though.
An extra window hole has been cut on the near side.

21/07/17
When I lightly sanded the paint for another coat I'd found I'd done it too soon (paint hadn't fully hardened) and some of the paint just peeled off. Initially this was annoying.
A minute later I realised it makes for a perfect weathered, peeling look so I'm gonna run with it.

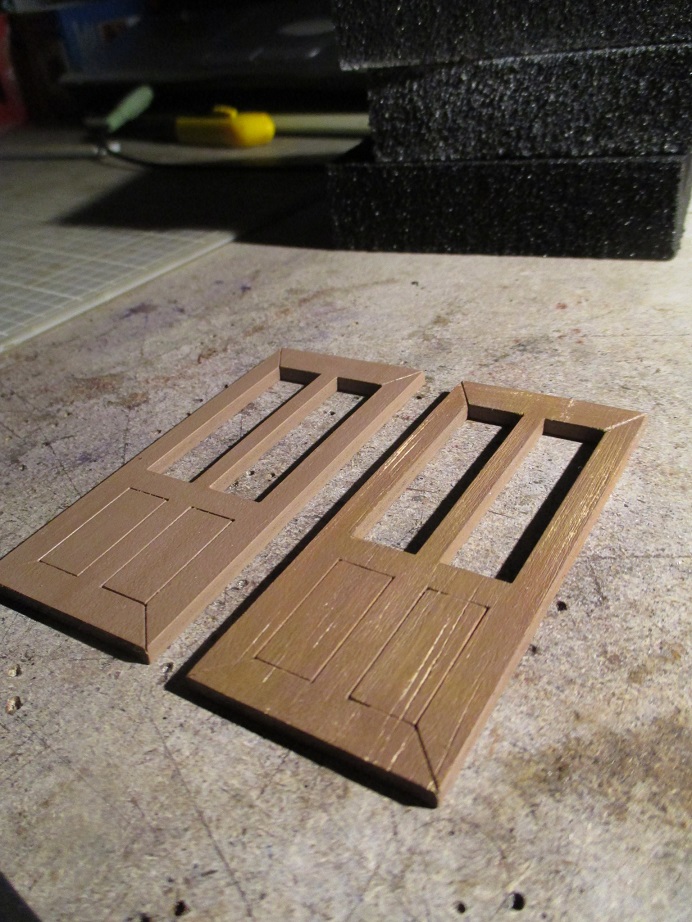
Windows and doors have been painted, then roughed up with a wire brush, then sealed with 2 coats of thinned polyurethane and glazed.
23/07/17
Veranda painted with washes to look like somewhat aged timber, windows/doors fitted and a styrene gutter made/fitted to the veranda support. Downpipe is also ready for when it's needed.

24/07/17
A lampshade for the veranda was made from an old wheel. I realised it wouldn't be visible in normal operation so it's better used somewhere on the sugar mill..

The piece of wall cut out for the extra window was reused as part of the battery holder. The gap is for the wires to pass through.

Two AAAs for this building.

28/07/17
After a few days delay, I was able to do the wiring. Not pretty as it's made of my offcuts but it'll do.
Baking paper is used behind the windows to diffuse the light coming through from inside, and eliminate the need for detailed interiors. I found hot glue to be quite useful in quickly attaching wires.

A tiny push toggle switch controls the lights, without having to uproot the building, except for changing the batteries.

The downpipe was fixed with "5 minute" epoxy at the wall end, and styrene solvent where it joins the gutter.

A little white paint to disguise the switch, and the electrickery is done.


04/08/17
The new house is all but complete, just awaits a coat of polyurethane for extra protection and it can go outside at the canefarm.

The shiny aluminium roof was toned down with a wash of grey enamel primer, thinned down with erm - thinners, and fine iron powder sprinkled over the wet paint where appropriate. It was then "streaked" downwards with a flat brush and allowed to dry.
Once dry, vinegar was applied to the roof with a mist spray bottle. Two hours later, the iron powder is rusting nicely..
Repeated the process where required, and once dry, a spray of clear enamel seals it from further rusting.

07/08/17
The crossing signposts had rotted out at the bases and were replaced with some scrap O scale rail, soldered to scrap bike spokes to hold them up. The same rusting treatment was used on them.
The original planks from the signs were cleaned up and reused, this time getting a coat of white paint because they're road signs and should be visible.

A small open air farm shed is also underway; This will go with the new house at the canefarm. The lumps of metal on the workbench are lead castings for dummy point levers, using the plastic Tenmille ones I already have, as a pattern. More on those in the line extension's posting.. Note the blackening on the bottom of the posts - Any timber in permanent contact with the ground is given the scorching treatment prior to the usual treatments, from now on. Stuff that's brought inside between running won't need that extra protection.

The grey road has been ripped out as I've never been too happy with the colour, and it would be impossible to remake the damaged section at Anzac Creek in the exact colour as original.
The new road will be the same concrete, but with reinforcing mesh and maybe a light brown colour.
The timber crossing boards (popsicle sticks, what else?) have held up well with their proper treatments.

08/08/17
With the extension tracklaying finally winding up I thought I'd better start testing and fettling the track with the Krauss. I may need a snowplough to get through the cutting.

The Krauss and bogey wagons run 99% of the track just fine, but there's still some spots needing reballasting where the old ballast has been washed away or settled too much.

Testing the placement of the house and shed at the farm. Some further tweaks to the terrain (and lots more mondo grass) should get this to work.

25/08/17
When I trimmed the trees in the backyard a few months ago, I kept a few of the bigger branches to cut up for logs and tree stumps.
The stumps were cut by hand and a 2mm hole drilled in the bottom on the drill press. Dad kindly let me use some unwanted galvanised bike spokes to cut up and use as locating pins.

Combined with some mossy undergrowth, they seem to do the job.

27/08/17
The new road has been built, along with a rough driveway for the farm. What I'm going for this time, is a dirt/gravel road.
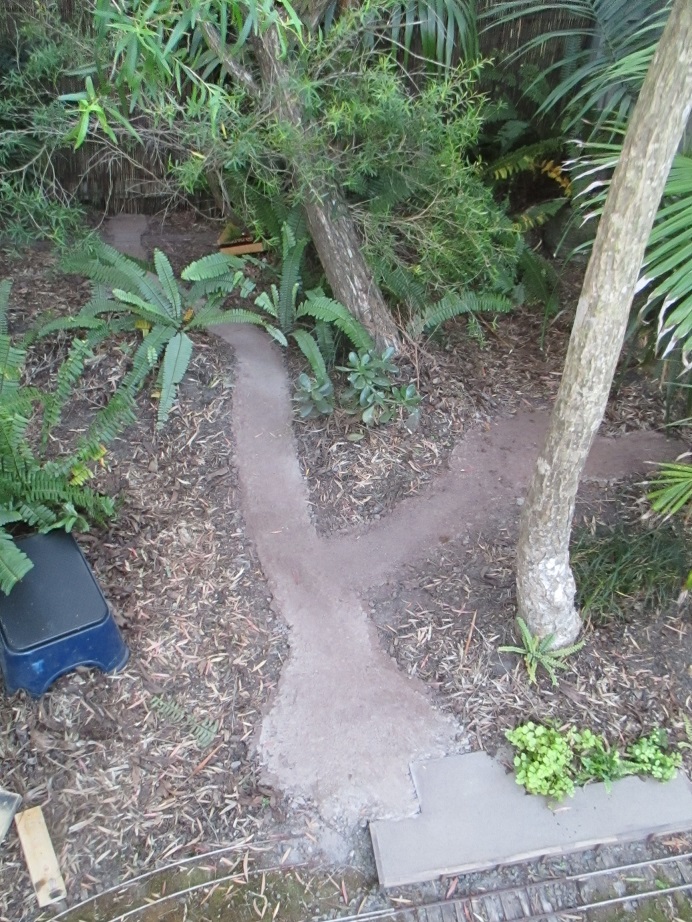
Some adjustments (and a sign warning others NOT to walk on roads or track), and I can call this job done.

03/09/17
Constructing the dummy point levers are done, now to paint/weather them all.

04/09/17
The farmhouse and shed have been installed. I'll need to add more cane plants and plenty of farm-type junk in and around the shed.
Later, I was finding the shed was getting blown upside down and onto the track all the time despite having extra long legs embedded in the ground to prevent this. This was highly annoying, so in early 2018 I drilled 2mm holes about an inch into the bottom of each post and epoxied 5" lengths of scrap galvanised bike spokes into the holes. Small joggles were bent into the bottom ends of the wires to help anchor the shed down. As of 04/04/18 I've not yet reinstalled it outdoors.
The crossing near at the North end of the garden finally has it's signs reinstated. I still need to build a cattle stop to go on the left side of the road.

18/09/17
Fences for the cattle grid after painting, and I remembered the windmill needs a paint/weathering job, which is in the background having had an initial coat of silver.
Fenceposts are Tasmanian Oak rather than balsa as previously used for fences. Tassie Oak is little better than non-treated pine (the latter being utter shit outdoors in any case), but even that's better than treated balsa in permanent contact with the dirt. Again, the scorching treatment was employed here.

I've been having problems with the plastic track expanding when it heats up in the sun, plastic's heat expansion ratio is far higher than even aluminium, so I was having numerous problems with it bowing up. The plastic points near the sawill sidings are no exception, and was causing the handlaid section near the sawmill site to bow up, too. So, it too was given staggered expansion joints, cut with the dremel.
In March 2018, I've noticed the rail on the left of the photo has been pushed upward by something, possibly a tree root somewhere underneath. I'll have to try knocking a tent peg-style steel hook into the concrete roadbed to hold it down, but I don't like my chances of getting it in there, I may need to pull the section up and relay it..

The windmill has had an initial rusting treatment with the iron powder.
I've yet to seal it, and get some black letter decals for the vane..

The only 2 functional point levers were installed today.


The cattle grid was finished, treated and installed. Might yet put a black/grey wash over it to lessen it's brightness, as it probably won't dull down by itself

16/10/17
The remaining dummy point levers were installed.

23/10/17
We've had a few really wet weeks lately, and it's compacted the ballast pretty well in places, so some reballasting was done on the Northern section.

Most of the ballast is ok though.

After a lot of fuck-arsing about with the track, the Malcolm Moore and the Krauss now run around the entire tramway without problems. I've not yet tested all the wagons but some are better runners than others.

Some bits look real fucking good.

It seems I didn't seal the rust on the cottage roof thoroughly enough, and it's bleeding through. Another clearcoat should rectify this, as I don't want a completely rust-coloured roof.
Other than that, the cottage seems to be doing alright so far. If I do notice any water damage though, it's coming straight inside and would only come out for running sessions.

06/11/17
The farm house and shed had to come out, as the cat run is being pulled down so the 1:1 scale house can be repainted.

14/11/17
Mum found some old photos from when we moved in 10 years ago. Our unit was brand new, we've been it's only inhabitants. Very different place, the garden was.

13/12/17
As usual, the hot times are back and I've retreated indoors while the jungle takes hold again.

29/01/2018
I've been meaning to build a little slab hut for years. So I decided I'd make one as a "quickie" project. Only took 30hrs to build! The fucked up part is that's quick for me.. A little driveway/path thing was also made for it. The windmill finally has a permanent place, too. A stock ramp is planned for the siding.

The vertical siding is tongue depressors, horizontal siding is laser-scribed ply leftover from a kit. Windows are cast resin, kindy given to me by a mate. Doorframe is scratchbuilt, with the door itself leftover from the farm cottage kit. Though the hut's been glued with outdoor-suitable glues, and thoroughly treated, this one's an indoor storage piece.

I was going to use an LED like every other building, but I needed a radiant glow from the lamp, which an LED will never provide, even when it's epoxy housing is diffused. So I used an incandescant bulb.

Gaps and all, that's exactly the effect I'm going for.

04/04/18
Back in February, the remains of the cat run were dismantled when we heard the owners of the unit want to sell it, so of course things needed to be tidied up for all the open houses and short-notice inspections we'd soon be putting up with. However, the rent's been going up year after year, and with more and more things with the house going wrong after only a decade, we've been playing with the idea of moving out. Hopefully an owner-occupier buys it, so we don't have to wait till out lease runs out in October..

It's nice that the cat run's gone, because the track near the cutting is actually accessible. (had to clear the leaves off the track so it's visible)

Personally, despite all the work I've put into the tramway and it's incomplete extension (that's never seen anything more than 3-4 test/navvies trains, and no steam at that), I'm very keen on moving on. In the tramway's 3½ year existence, it's been used maybe a dozen times, if that.
There's several reasons for that:
1. Because the backyard is tiny, the track has had to be shoehorned into wherever it'll fit, (particularly the extension) which makes most of it very inaccessible for removing leaves, sticks, stones etc. from the track prior to a run. It takes about 2 irritating hours just to sweep the track.
2. All the points are garbage, frankly. My early handlaid efforts are known to be unreliable at best, and I'm finding the Newqida points to be unsuitable for full outdoor exposure. They don't throw properly anymore, and the heat distortion plays too many games with the surrounding track.
The Newqidas would be ok in a garden under a patio, at most. For the price though, I have no regrets.
3. Most of the sleepers are rotting badly, with some sleepers being held together by moss alone. Virtually the whole original layout will need pulling up and re-sleepering in the next year, or two at most. This doesn't surprise me considering it's all secondhand timber of unknown types - it's an inevitability with wooden sleepers.
4. The heat and humidity here on the Sunshine Coast, especially this close to the beach, is a huge disincentive to going outside. This effectively rules out 7 months of the year for me, because I sweat excessively. The heat usually isn't so bad, it's the humidity.
5. My Roundhouse Fowler "Victoria" (in the final stages of construction at the time of writing) will look terrible negotiating the 2' radius curves I've had to use to fit the track in the yard. Yes, that's something I should've considered before I started building it, I'll own that cock up. Additionally, I'll have to take two large notches from the bottom fence rail, just to provide the clearance on the extension.
In short, it's easier for me to pack a loco, train and steaming kit in a wheely bag, take a 5-hour round trip down to the AMRA QLD elevated track in Northern Brisbane and run there, than it is to run at home; I go down there once every month or two. A lot of things need to change about the Anzac Creek line, and all those changes simply can't happen in this backyard..

I've no idea weather this nasty distortion of the junction near the loco shed is due to the plastic points, or a tree root pushing things around. Either way, constant derailments are guaranteed if I don't fix this and replace those distorted points.

Sword ferns and weeds invading everything as usual. Would take a day or so to cull it all back, if I wanted to.

As for the thousands of hours I've put into this thing, only to not really get to use it, I've only 2 regrets: I should've worked harder to get it finished sooner, and more importantly, I should've just forced myself to set it up and use it more often. But I guess I've explained why it was so little-used anyway.
I was going to get it done and have my mates over for one first/final run before it's all dismantled, but I just don't have the energy to deal with this one anymore. I've run out of fucks to give.

It's not seen steam since early 2016, over 2 years ago at the time of writing.
At this point, I've decided I'm firmly set on moving out, and hoping everyone else at home is also open to it - I don't want to try and drag them out.
There's a couple model train swap meets in the next month, so I'm saving up in the hopes there'll be some cheap pre-owned G gauge track - proper stuff with plastic sleepers and proper, reliable sets of points. Plus I have a mate who usually has secondhand track in stock at his shop!
No more fucking around, The Fat Cuntroller is gonna build something useable, something everyone can enjoy without worrying about derailments and assorted flavors of bullshit.
Now I'd be shocked if anyone makes it through this wall of text in one sitting. It took me two hours just to proof-read it! Then I still have two other long-arse posts to write. Ugh, fuuuck...
But congratulations if you did make it through in one go, you win absolutely nothing! Hopefully you got something useful from my ramblings.
If you're a masochist, here's the write-up on the extension..
No comments:
Post a Comment